
30 May 2023
Laravel
how-to
Building A Scalable Laravel Application
Introduction
In scenarios where independent developers are working on an initial project that begins small and gradually scales over time, it is common practice to deploy applications on a single server. This means that all components of the application, such as the main application, database, queue, and others, are hosted on a single server.
Deploying on a single server is cost-effective for smaller projects and indie hackers who may have budget constraints as it eliminates the need for additional infrastructure, making it a cost-efficient solution during initial stages. Additionally, deploying on a single server simplifies the development and debugging process since having all components within a single environment makes it easier to monitor and troubleshoot issues during.
However, as the user base grows, this approach can impose a heavy load on the server, leading to application slowdowns, increased risks like single point of failure, maintenance and upgrade challenges, and potential security vulnerabilities.
To address these challenges, developers recognize the need for a multi-server architecture. By distributing the application across multiple servers, the workload can be balanced, ensuring better performance and availability.
Overall, the multi-server architecture provides scalability, performance optimization, fault isolation, flexibility, security, and easier maintenance. It is a proven approach for building complex applications that need to handle high loads, store large amounts of data, and provide a reliable user experience.
By the end of this blog, you will have a solid understanding of how to deploy a multi-server architecture in Cleavr. So, let's dive in and explore multi-server architecture deployment in Cleavr.
For demonstration purposes, I will be using Feedmas, a platform we built at LittleBets to manage our customer support requests. We wanted Feedmas to have a dedicated database and queue server so we could provide a scalable and reliable solution. To accomplish this, we deployed Feedmas using Cleavr to setup and manage the multi-server architecture.
Feedmas consists of a main application server, a PostgreSQL database server, and a Redis queue server. The main application server will host the primary application logic, while the PostgreSQL database server will be responsible for storing and managing the application's data. The Redis queue server will be used for task management, message queues, and other related functions.
Here is a summary of what I will be covering in this blog:
- Introduction
- Provisioning servers
- Create a site
- Link Servers
- Sync Environment Variable
- Add deployment hooks and deploy
Provisioning servers
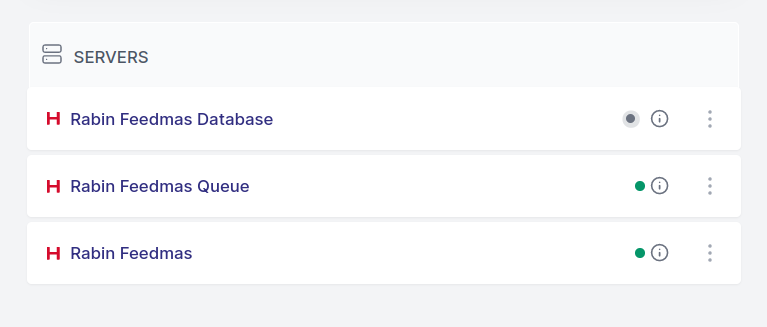
First, I will provision three servers,
- App Server ( Rabin Feedmas )
- Queue Server (Rabin Feedmas Queue)
- Database Server (Rabin Feedmas Database)
Create a site
Once the servers are provisioned, I will head back to the App Server and create a Laravel site. For this, I will go to the Servers page and click on the Feedmas server and then click on the Add site button.

Link Servers
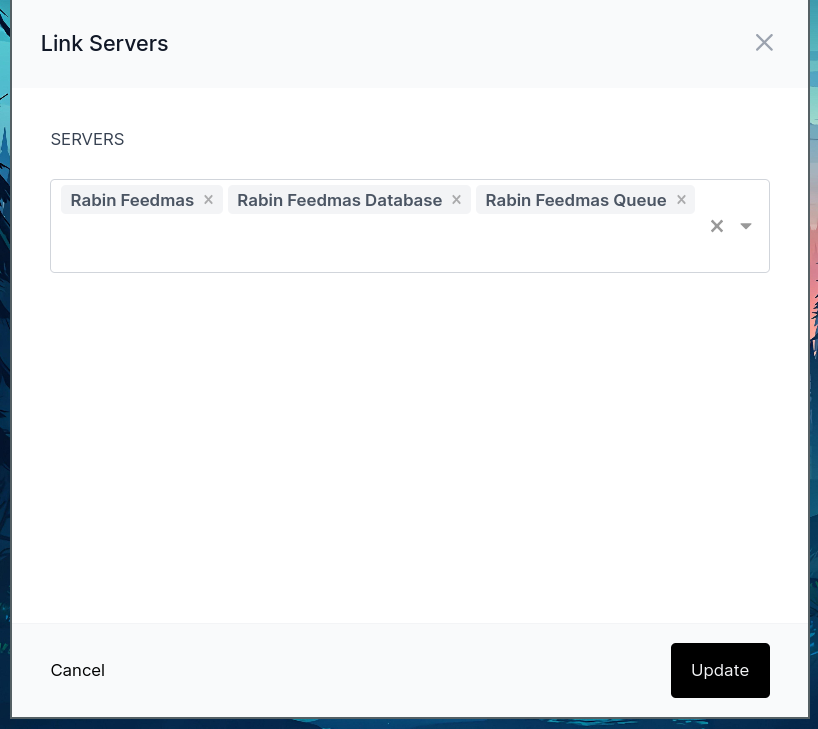
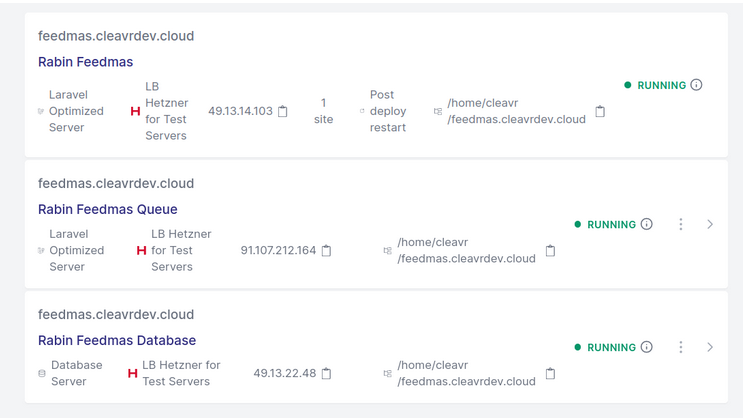
To organize & maintain all three servers, I will go to **Deployments > Networks ** and click on Link Servers. Once the servers are linked we can organize the respective hooks for each server and we don't have to worry about triggering individual deployments in each server. Also, it allows us to sync environment variables between multiple servers.

Sync Environment Variable
It might be the case that multiple servers may share the same environment variable. So, to link those environment variables, Cleavr allows syncing environment variables between multiple servers. In our case, App server and Queue server share the same environment variable so I will sync them.
To sync them, I will go to Deployments > Environments and after updating the environment file, I will click on the Sync button.
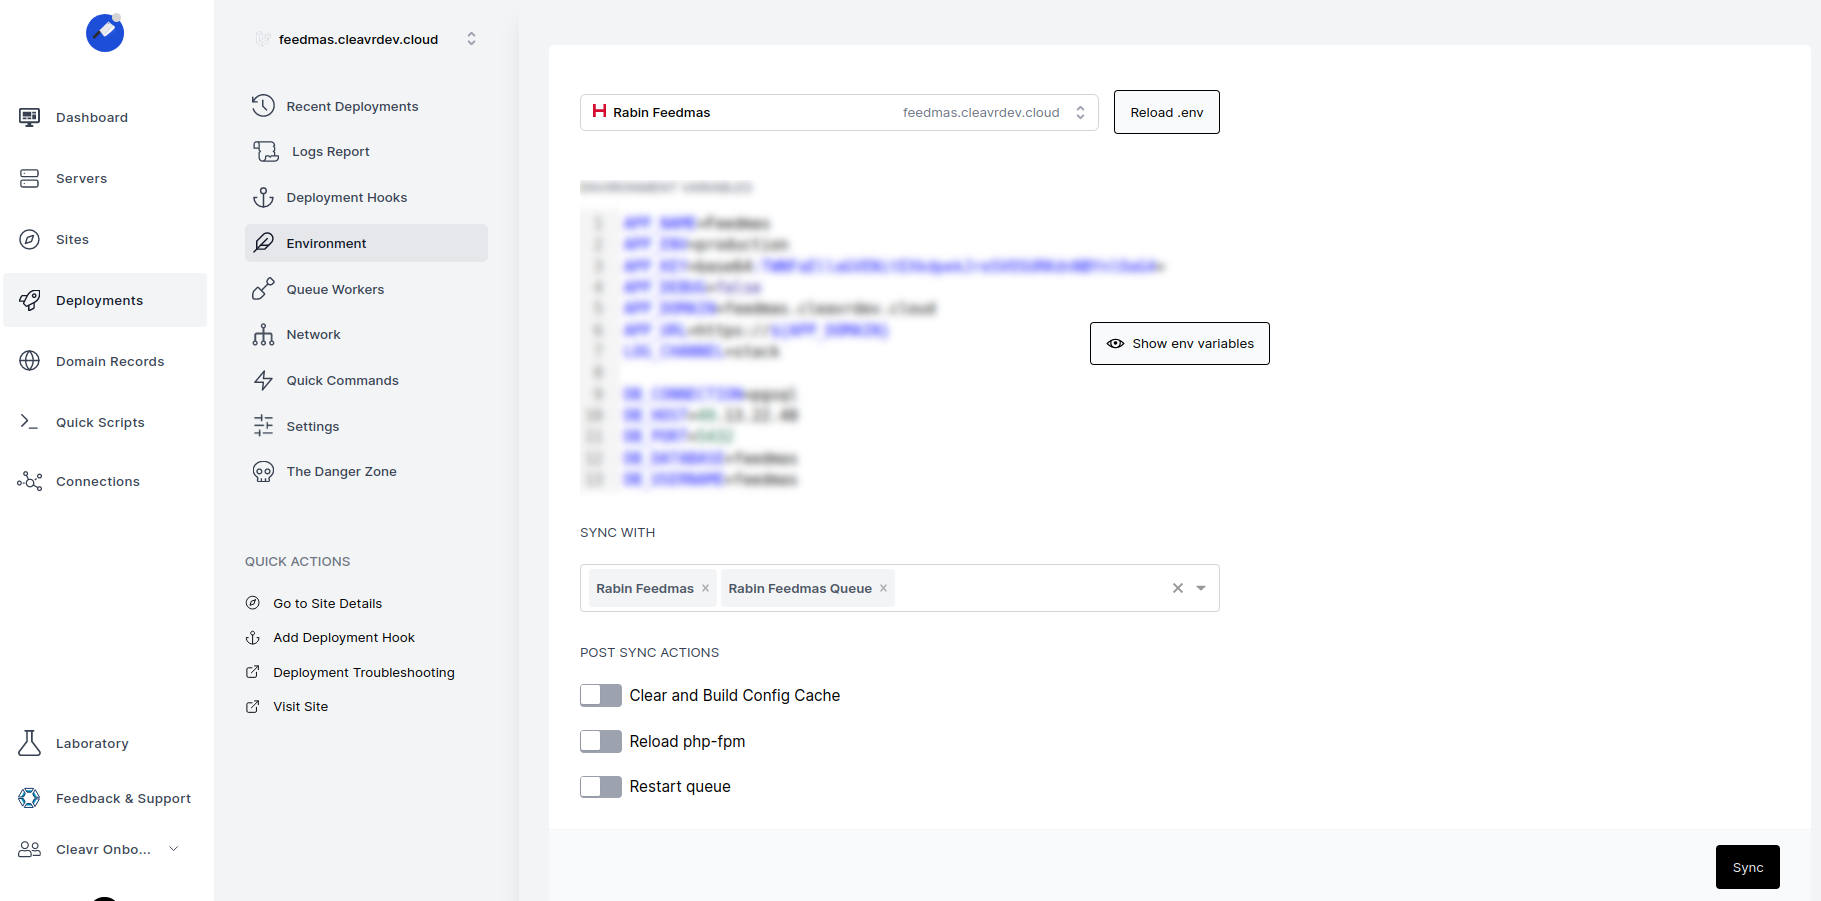
Now, environment variables for both Feedmas and Queue Server are synced.
Add deployment hooks and deploy
Deployments hooks are located in Deployments > Deployment hooks. Make sure your deployment hooks are linked to the correct servers. For example, to update the Copy Project hook, click on the ellipsis icon and click on the Edit hook.
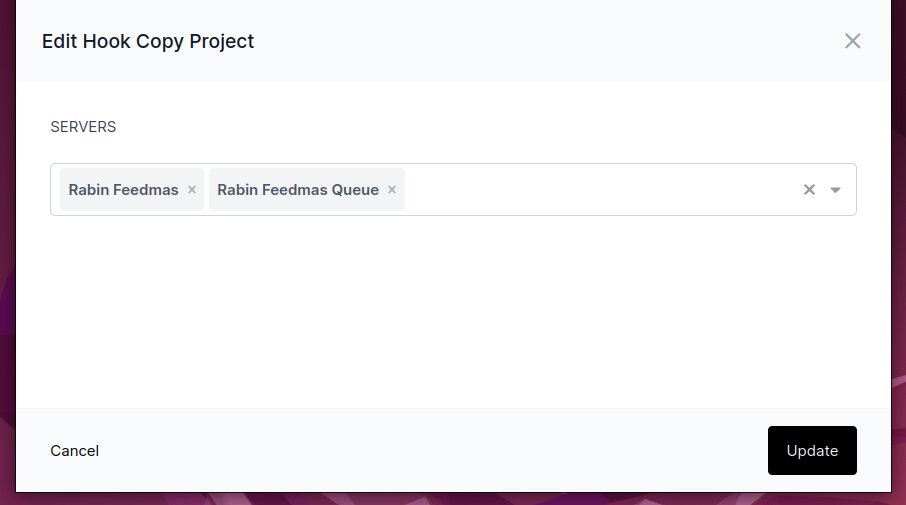
I am going to copy projects on two servers, App server and Queue server.
Also, you can add your own custom hook. For example, in our application we need to restart the queue in our Queue server. To do so, I will go to Deployments > Deployment hooks and click on Add Hook.
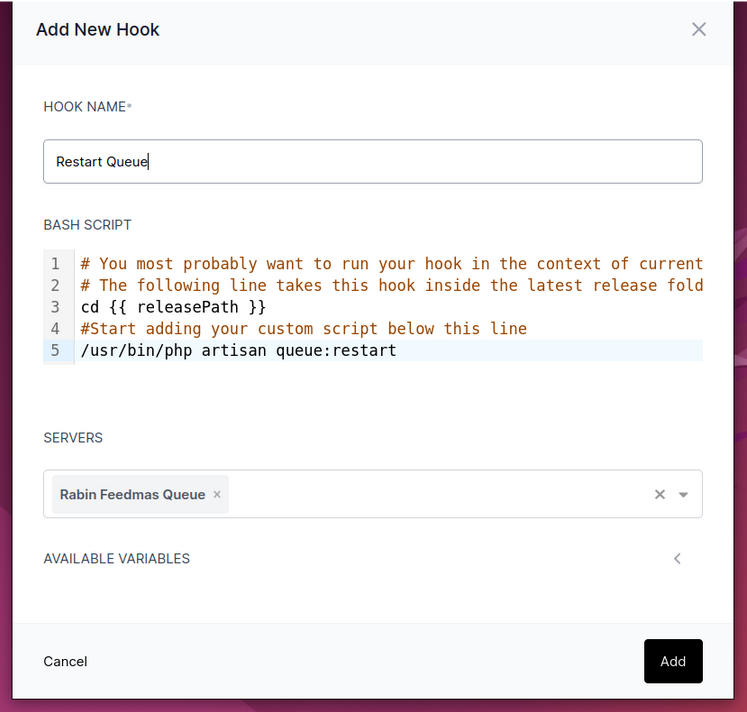
You can also select the servers where you want the hook to be triggered. Similarly, you can edit other hooks accordingly. Make sure your hooks are placed in the correct order and assigned correctly to the right servers.
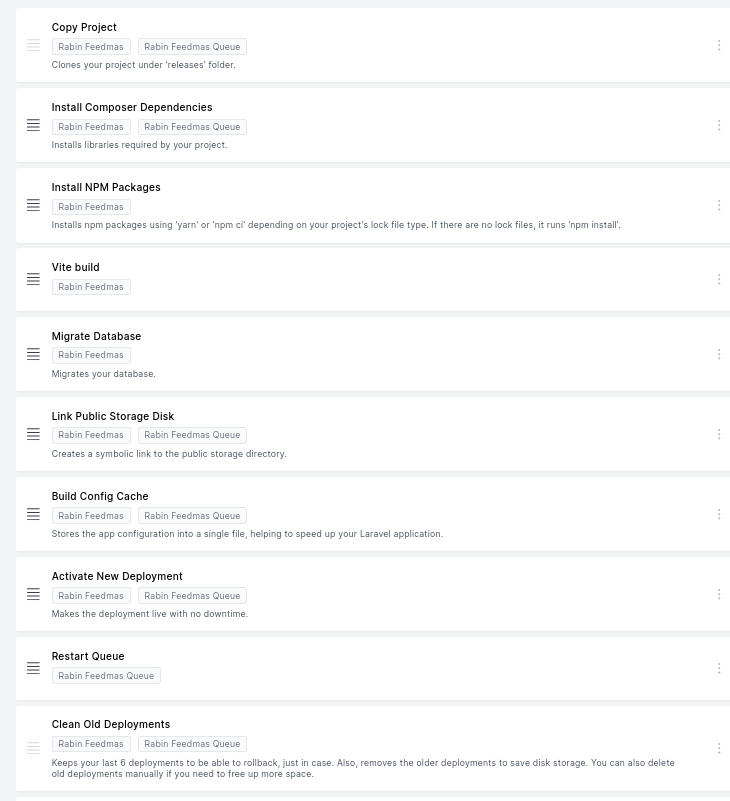
Ok, so now deployment hooks are all in place. It’s finally time to deploy the application. To do so, I will go Deployment > Recent Deployments and click on Deploy.
Hurrah! Now, our Feedmas app with multiple servers is finally deployed. If you have a multi server architecture or you are trying to scale your application, Cleavr makes it a breeze in managing these servers.
Take control of your servers and deployments.Without breaking a sweat.
Sign up for a 5-day free trial of Cleavr Pro. No credit card required until you decide to subscribe.
Sign up for freeCleavr
© 2025 Vistafari LLC. All rights reserved.
❤️ ☕️ 🎨
