
08 March 2022
blog
How to inject environment variables into GitHub Actions
The build process when deploying an application can be a vert taxing process for a server to handle, taking up a lot of the server's processing power.
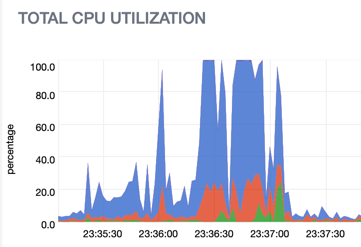
To give you an idea of server load required to build an app on the server vs GitHub Actions, check out this comparison of CPU utilization.
CPU utilization while building an application on your own server:
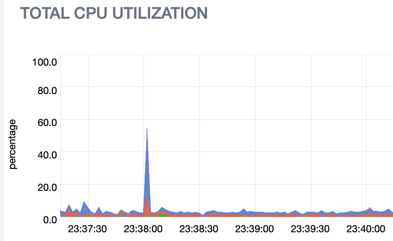
CPU utilization while building an application using GitHub Actions:
One of the ways you can claim back some of this processing tax is by offloading the build step to an external server or a CI.
Using GitHub Actions is one of those options.
However, setting up GitHub Actions is not all that fun and you may likely have to invest at least a few hours to get it up and running.
But... You're in luck! If you have a NodeJS app repository on GitHub, Cleavr makes this as easy as 1-click.
For most apps, the Cleavr - GitHub Actions integration gets you all the way to having your app built on GitHub and deployed on your server.
Though, in a few situations, you might have to make a tweak, or two, to the GitHub Actions workflow generated by Cleavr.
Offloading the build step to GitHub Actions brings one unwanted headache - if your build step happens to depend on some environment variables, then you'll need to find a way to inject them.
One option is to hard code those variables. However, this is not a desirable method as you don't want sensitive information to be in the source code. Hard-coding in this manner is not a good practice.
But fear not, you can still inject environment variables during the build process as well as keep them separate and masked.
Let me show you how:
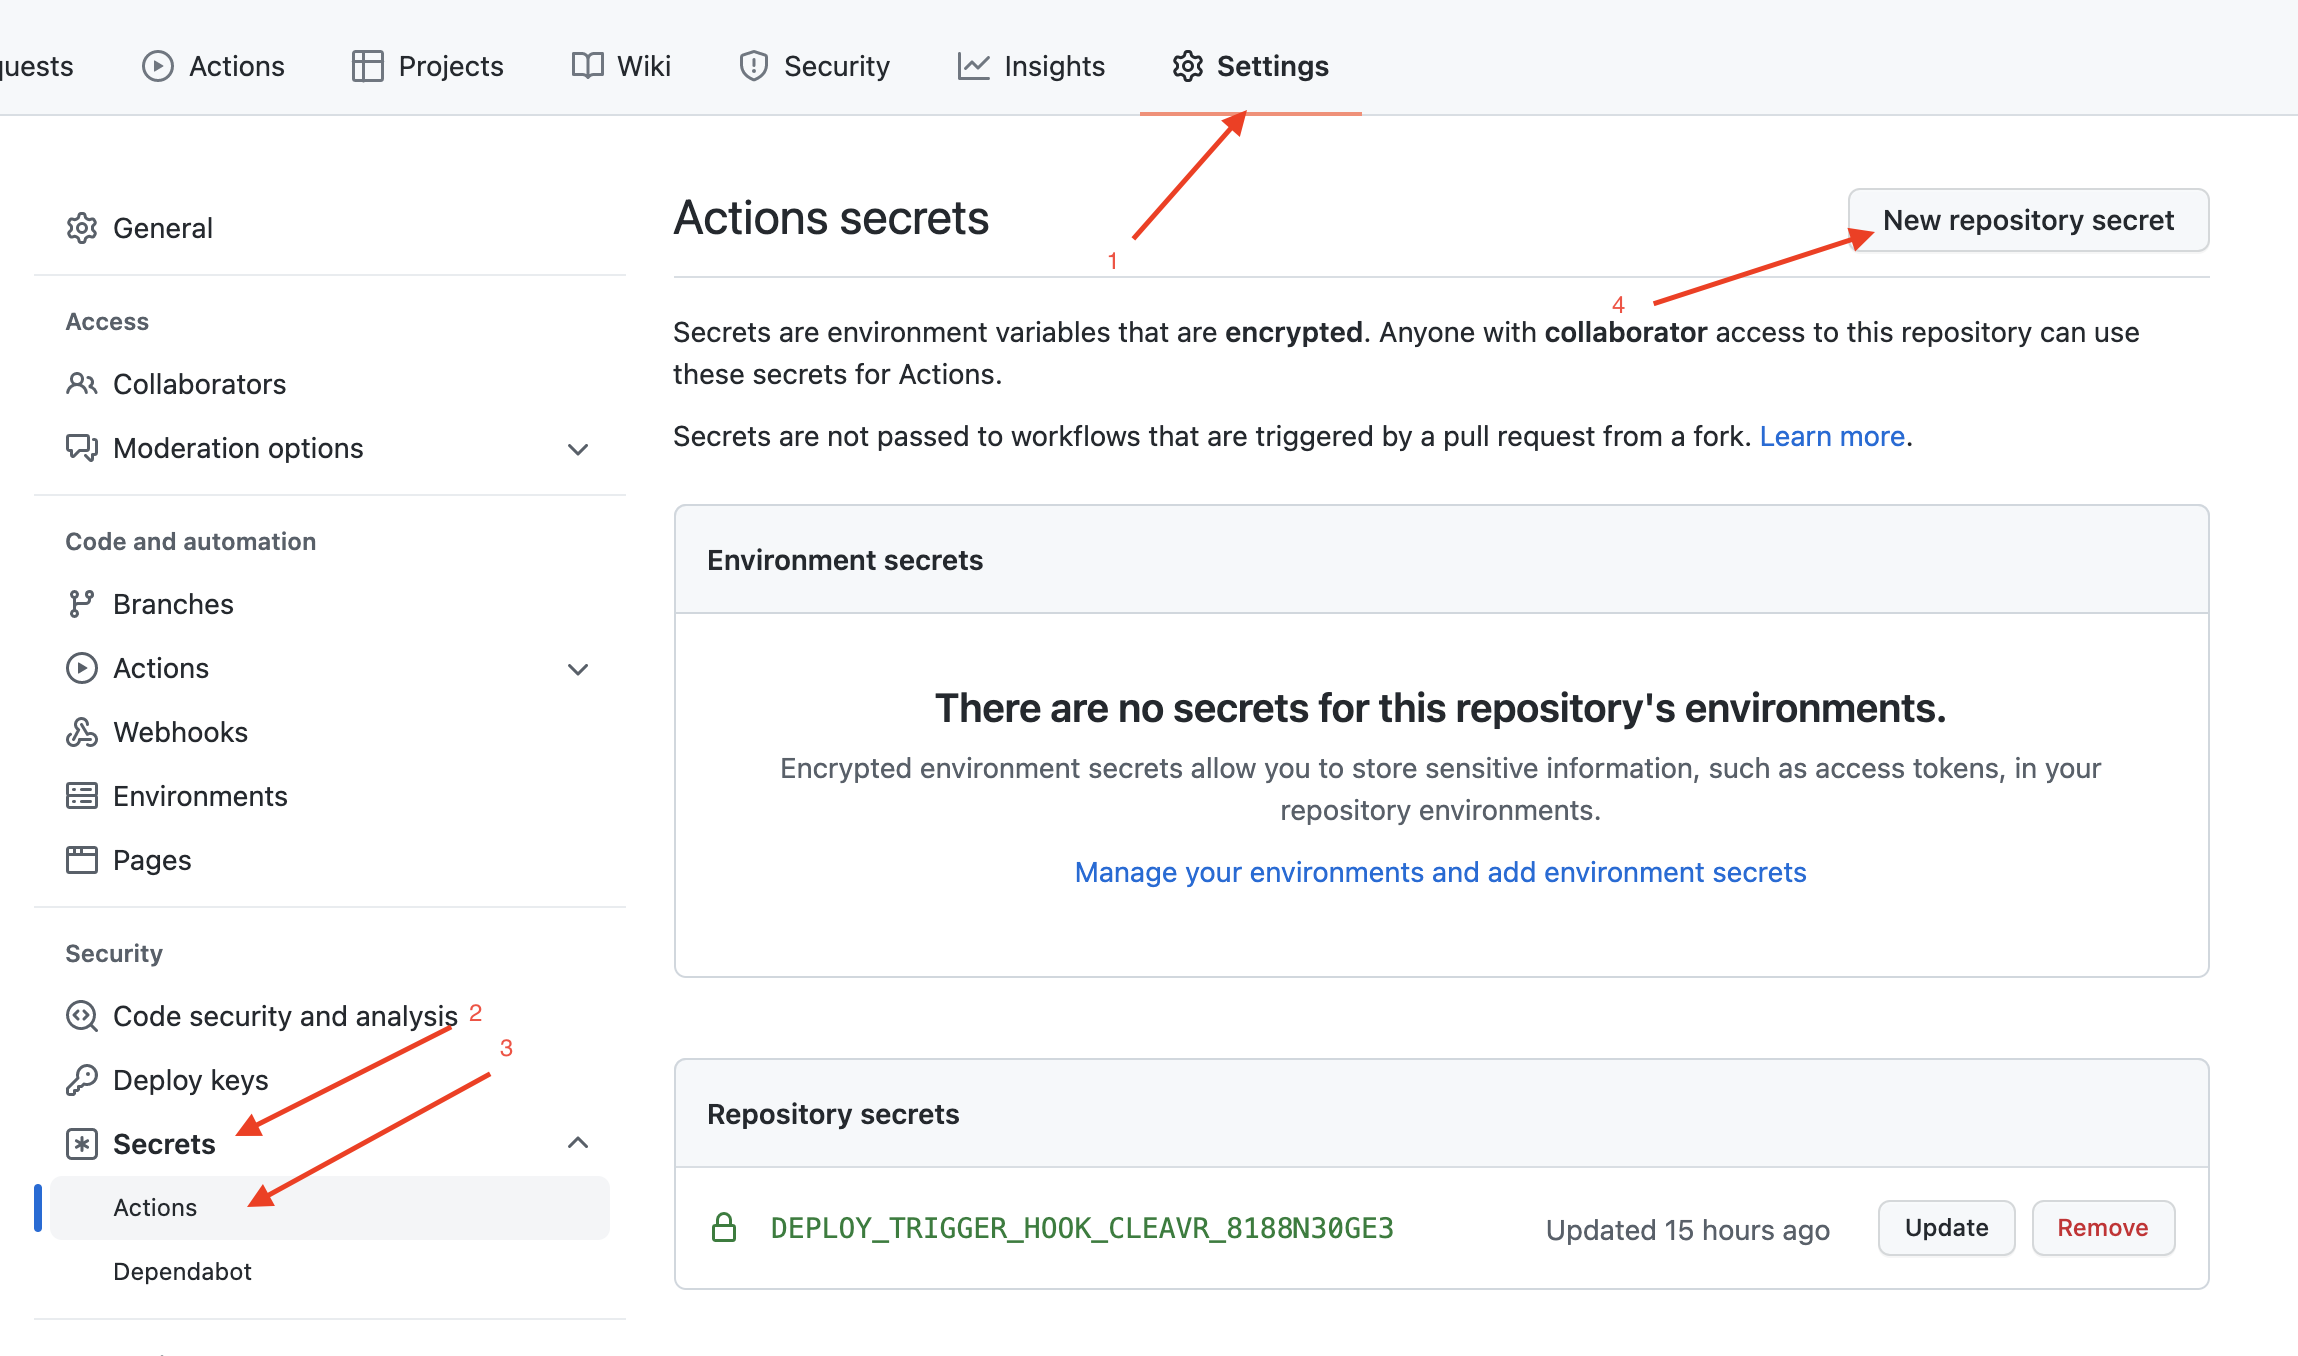
First, let’s set some 'secrets' to the GitHub repo so that we can use them in our workflow file. The secrets option is available under the repo settings. You can there by going to your repo and select the settings tab.
On the side navigation, we can see the Secrets option. In order to create a new secret click on Secrets and then on Actions.
Once you are here, you can now create secrets using new repository secret.
Now, if your app requires BASE_URL during production build and it’s typically read from the .env file, you can now add BASE_URL as a secret here.
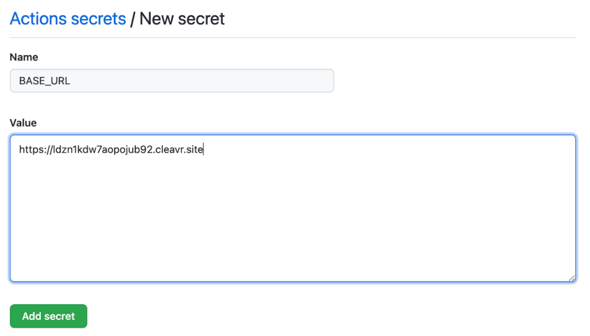
Once you add these secrets, they are available for use inside the workflow file.
Now, your build process tries to read your .env and it is obvious they will not be there.
To overcome this, we'll modify our workflow file to create a .env file and set the values to read from GitHub secrets.
Inside the workflow file, create a new step with the name create env file.
This step should run before the build step, so make sure to keep it above the build step.
The create env file step should look like this:
- name: create env file
  run: |
         touch .env
         echo BASE_URL=${{ secrets.BASE_URL }} >> .env
For each of the secret you’ve created, you can do:
echo SECRET_KEY=${{ secrets.SECRET_KEY }} >> .env
Ensure sure that each secret goes on a new line.
Now, next time you deploy using Cleavr with GitHub Actions enabled, your project will build with the necessary environment variables!
Take control of your servers and deployments.Without breaking a sweat.
Sign up for a 5-day free trial of Cleavr Pro. No credit card required until you decide to subscribe.
Sign up for freeCleavr
© 2026 Vistafari LLC. All rights reserved.
❤️ ☕️ 🎨