
09 June 2022
blog
Enable Laravel Horizon (Part 2 - The Easy Way)
If you’ve been following the Laravel Horizon series blog, you must’ve felt a little pain while deploying a Laravel app for which you require Laravel Horizon dashboard to monitor jobs. We’ve decided to come up with an easier solution! Recently, we released Laravel Horizon support in Cleavr that’s available in the Feature Lab.
Let’s first quickly provision a server and create a Laravel site.
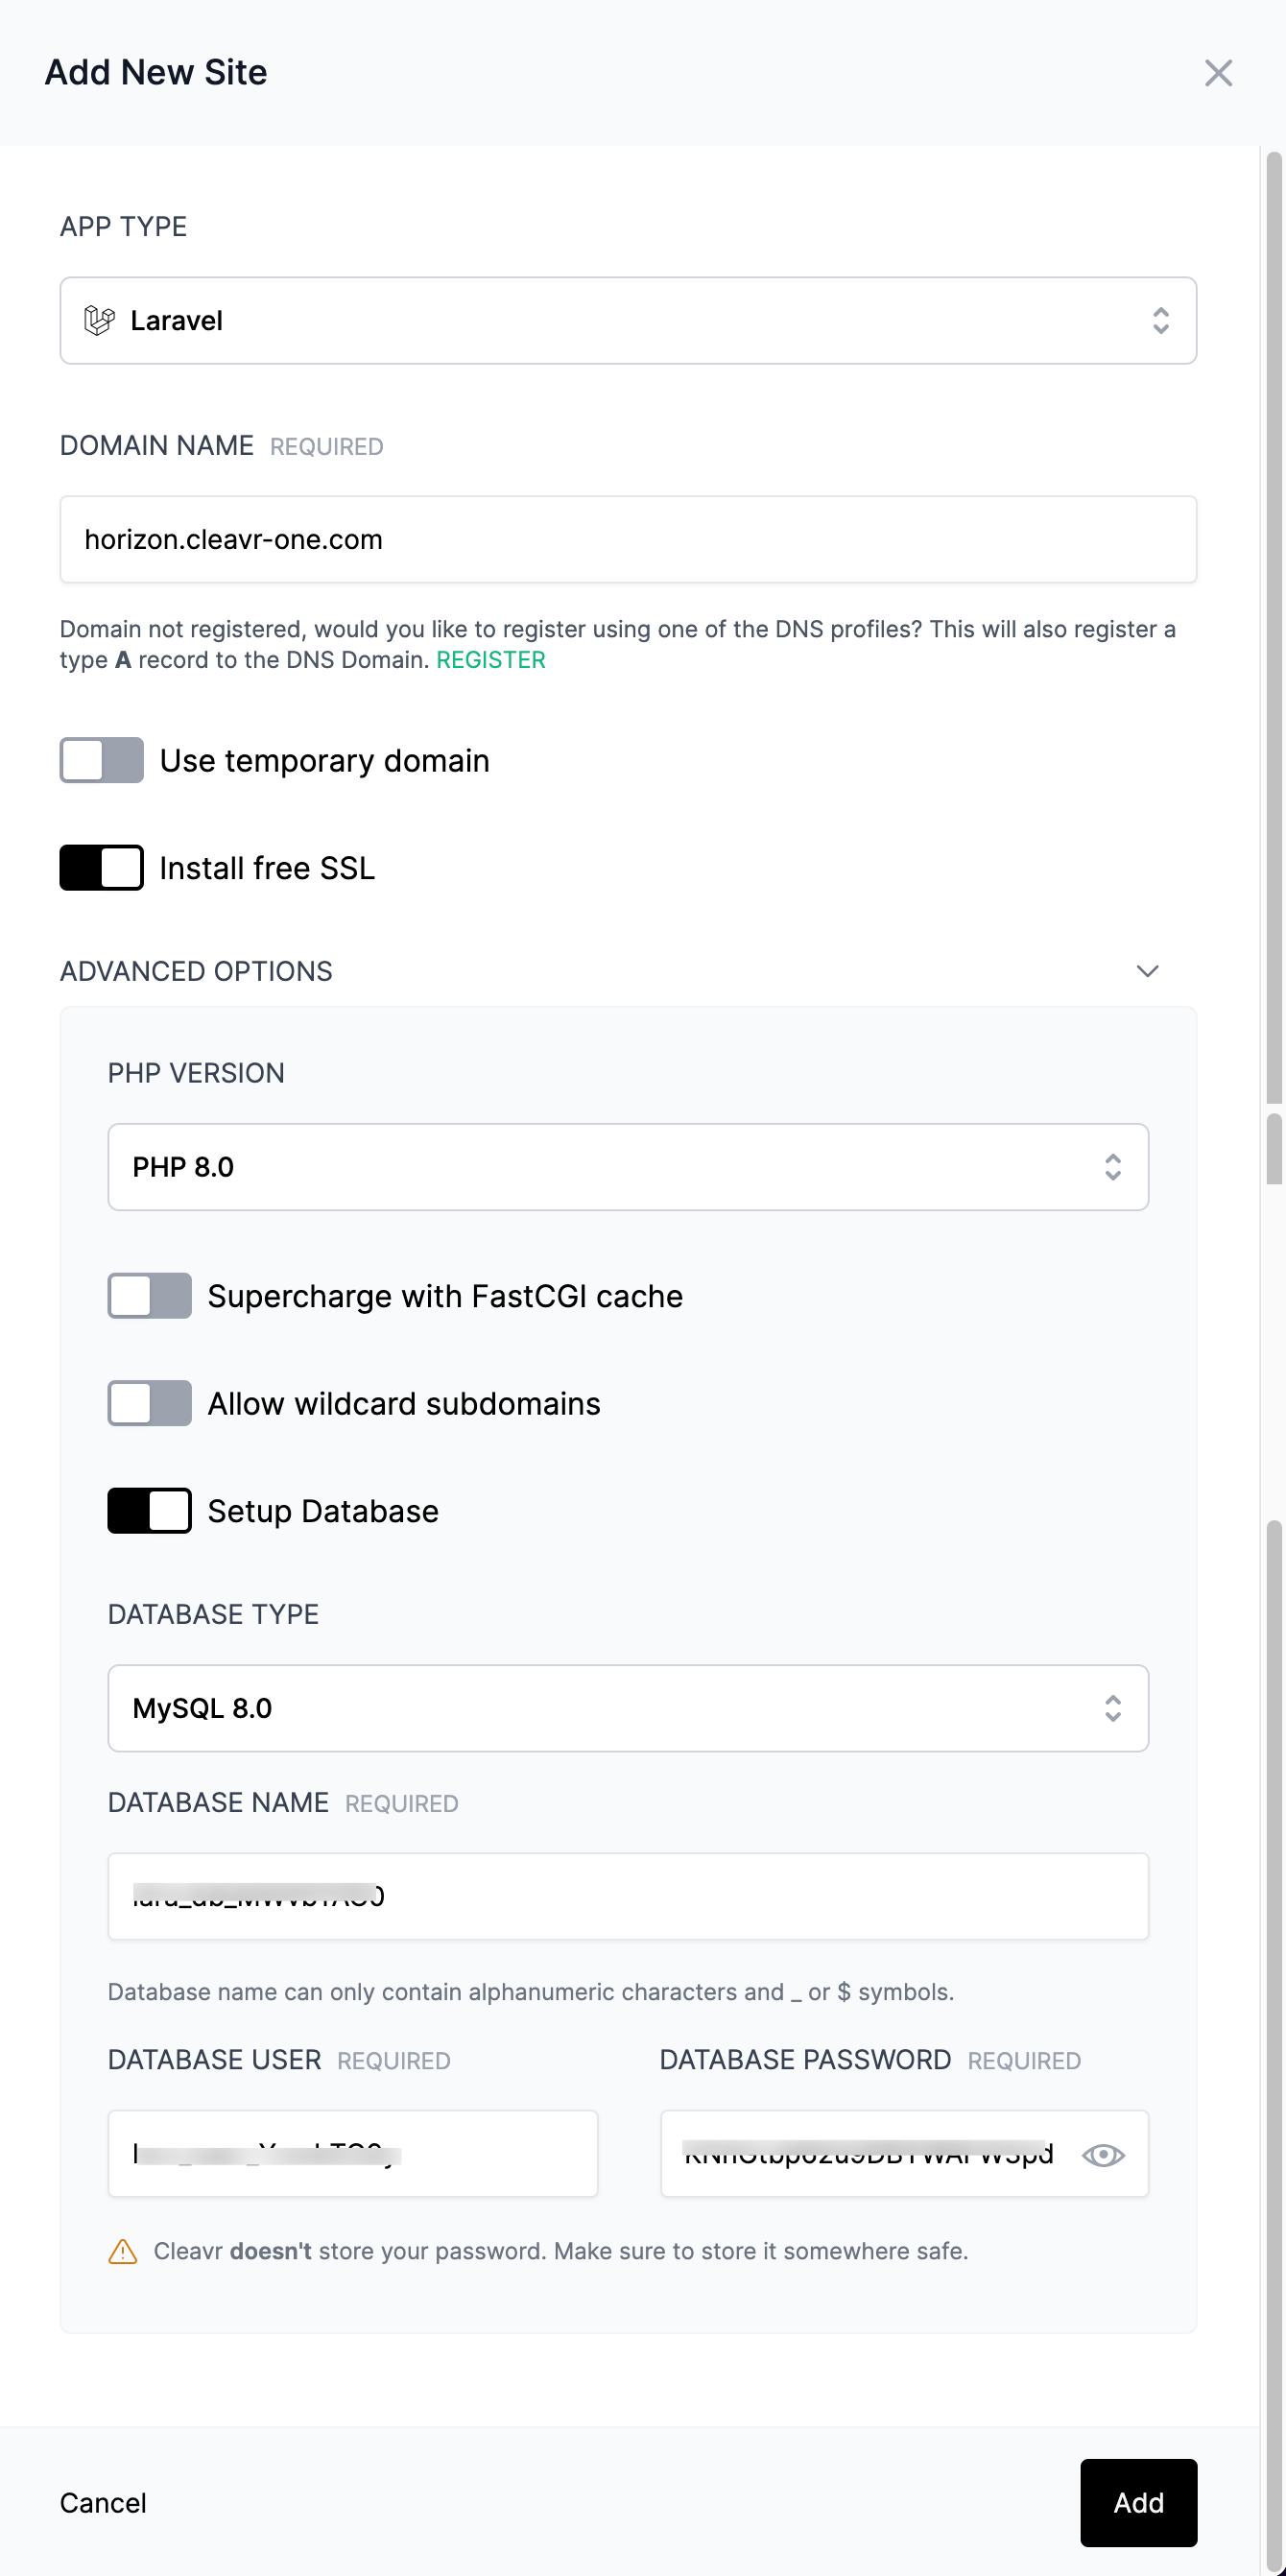
From the screenshot above, you can see that I’ve created a Laravel site, enabled SSL, and created the database required for our Laravel app. That’s how amazing Cleavr really is. ;)
Now, let’s head over to the webapp section. From Webapp > Settings > Code Repository, I’ll first
update the repository details. I’ll be using
https://github.com/anishghimire862/laravel-horizon-example for the demonstration purpose.
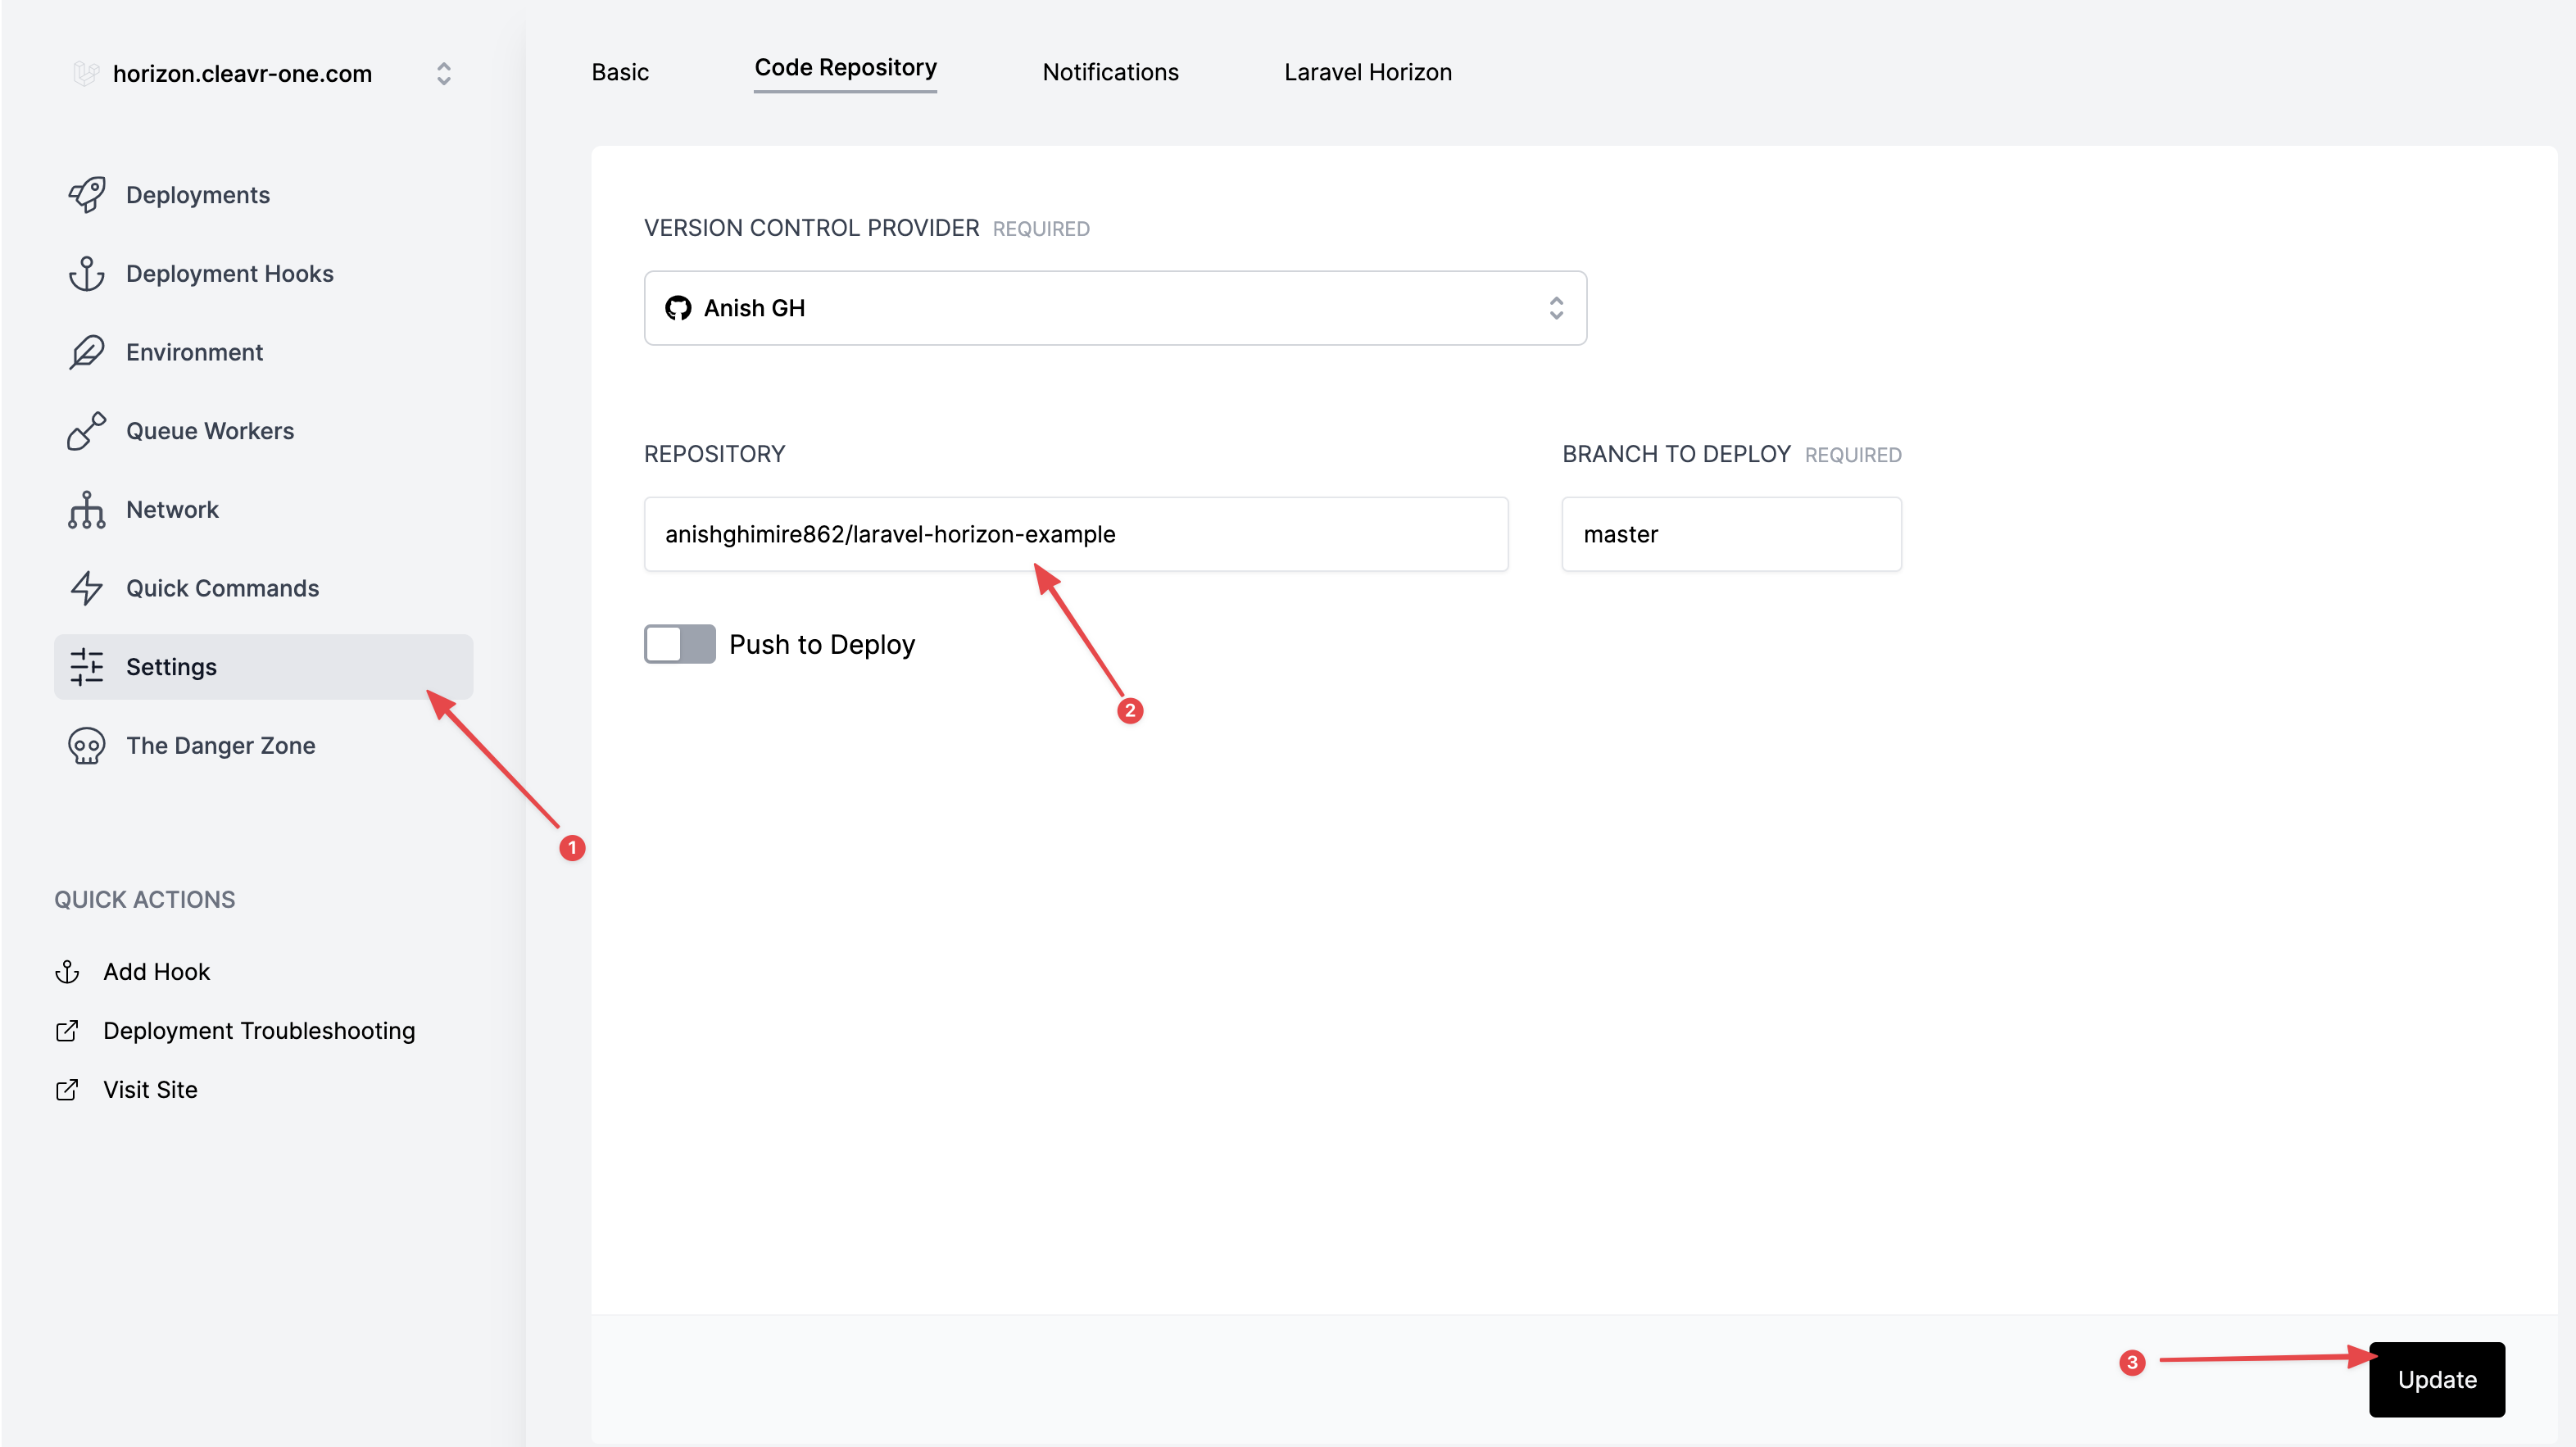
Now, head over to Deployments page (Webapp > Deployments) and click on Deploy button so that our app
gets deployed, and we can enable Laravel Horizon.
Once the webapp is deployed go back to the Webapp Settings page again and change the tab to
Laravel Horizon and click on Enable Laravel Horizon button.
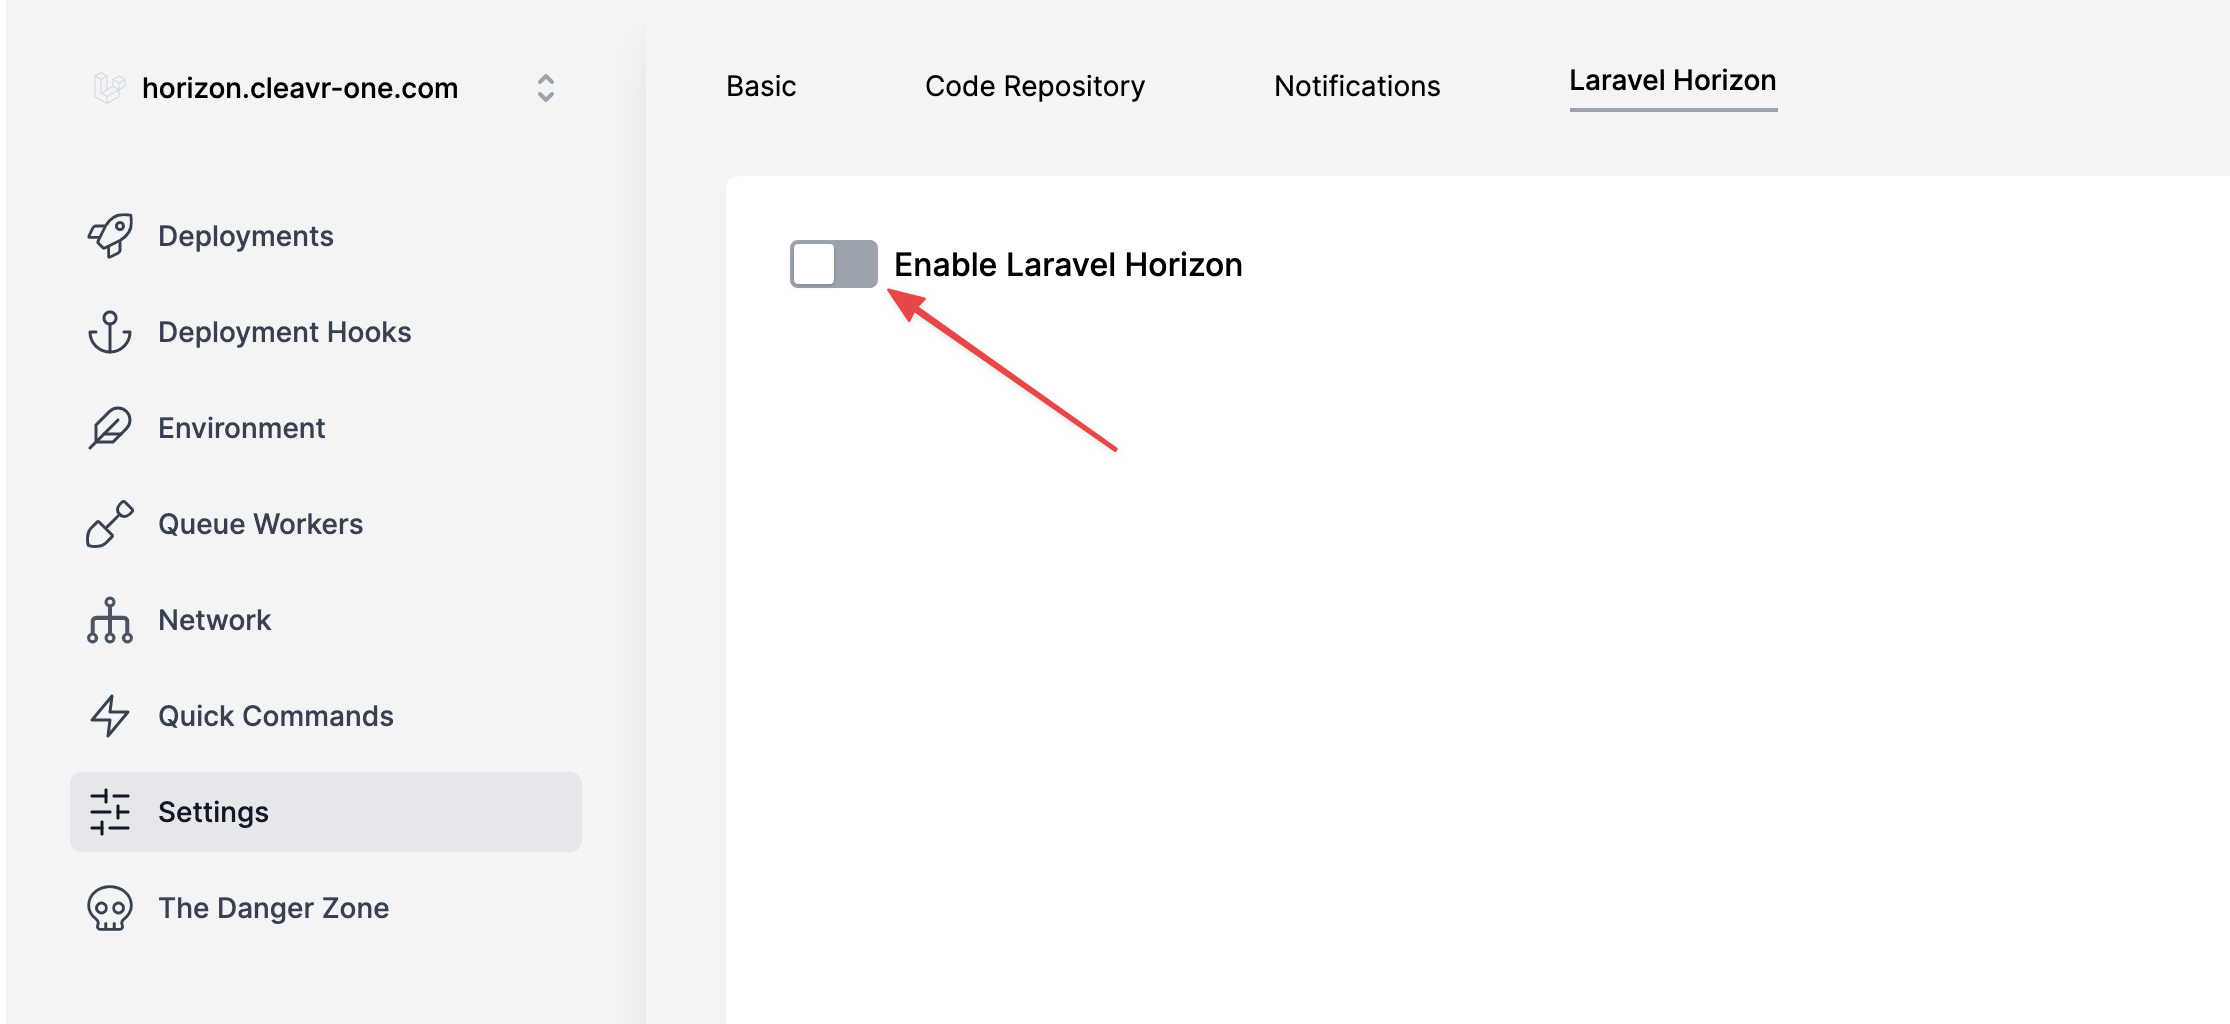
Once you’ve clicked the button you’ll receive an alert saying Laravel Horizon enabled in just
a few seconds.
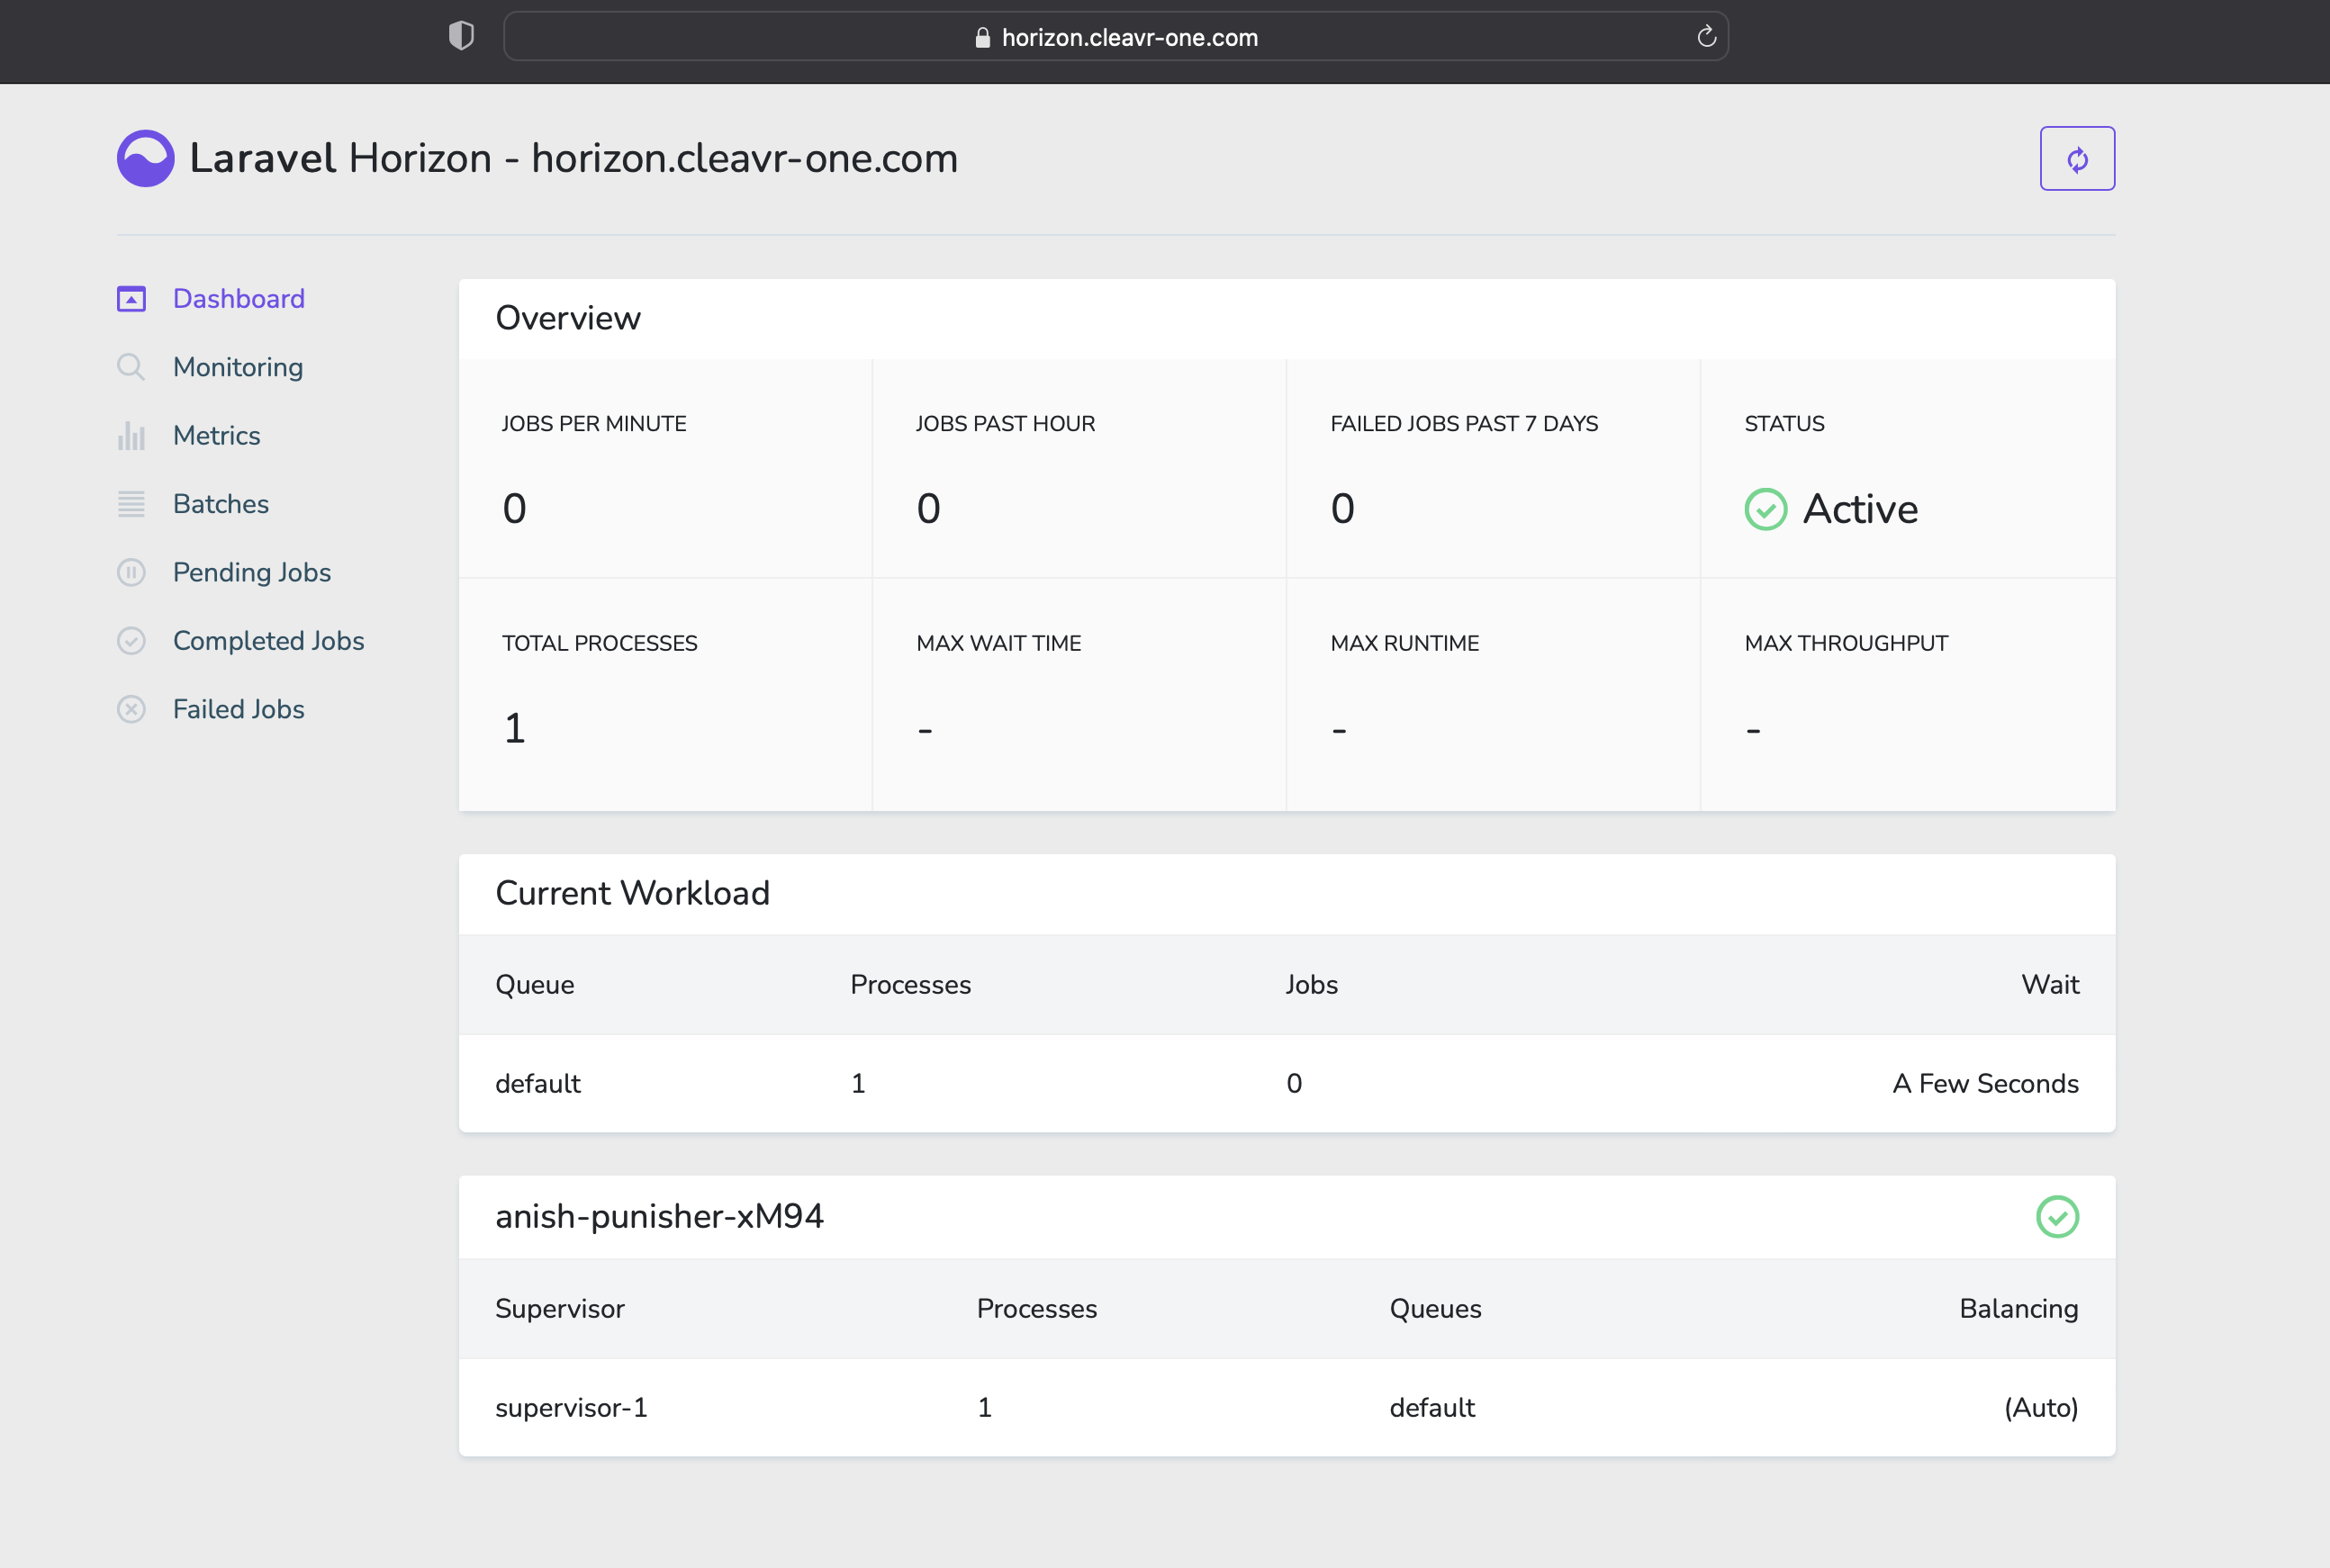
Now you can visit your Horizon dashboard (/horizon unless you’ve not used a custom domain).
If you’re using a custom domain for Horizon dashboard, you can update the URI that we display
in Cleavr with the help of update button.
No more SSH’ing into the server, installing this and that, copying config files, etc! One single click and… BOOM! The Horizon dashboard is live. We took care of the creating config, starting/restarting, and terminating Horizon process. Actually, we love converting a boring task to a fun one at Cleavr. ;-)
You can also Pause or Continue the Horizon service using the option available in Ellipsis
at the right side.
Take control of your servers and deployments.Without breaking a sweat.
Sign up for a 5-day free trial of Cleavr Pro. No credit card required until you decide to subscribe.
Sign up for freeCleavr
© 2025 Vistafari LLC. All rights reserved.
❤️ ☕️ 🎨
