11 June 2022
blog
How to deploy a NestJS application in Cleavr?
NestJS is a framework used to develop server-side applications. In this blog, I’ll show how you can deploy your NestJS application using Cleavr.
I’ve created an example project with NestJS to use for demonstration purposes. You can find the project here.
Many NestJS projects hard code the port number, which causes the site to render 502 after the deployment. So in this project, I’ve used the PORT number from the .env file while starting the application. To use environment variables in Nest, we need to create a ConfigModule that exposes a ConfigService which loads the .env file. You can check the code for it in the demo repo.
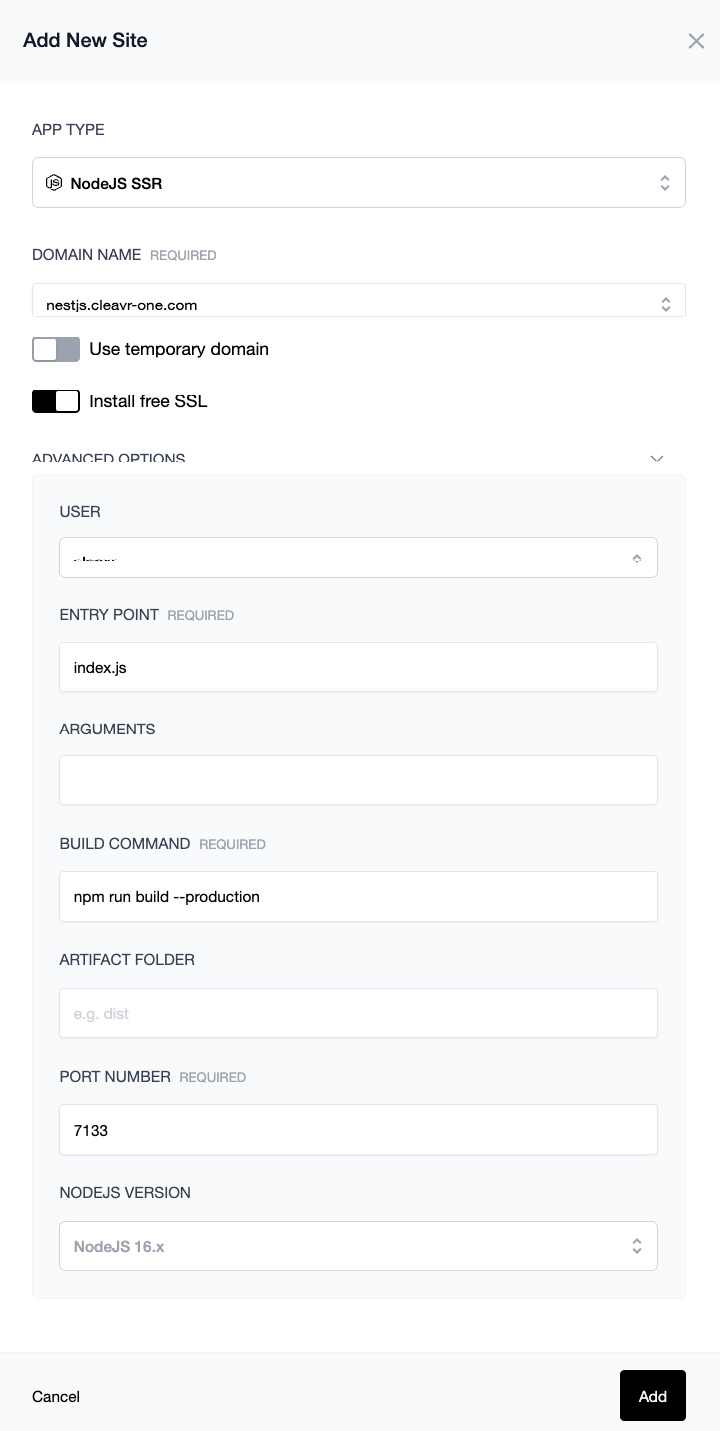
Head over to the Cleavr and quickly create a NodeJS SSR site.
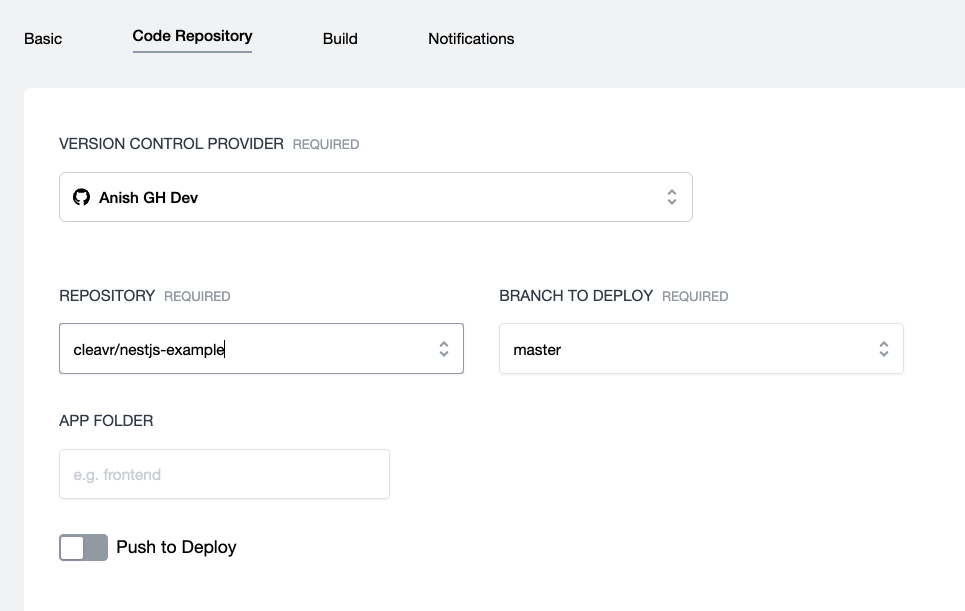
Once the site is created, click on the Setup or Deploy button or navigate to Webapp > Settings > Code Repository. Select the VC Profile, update repository, and branch details.
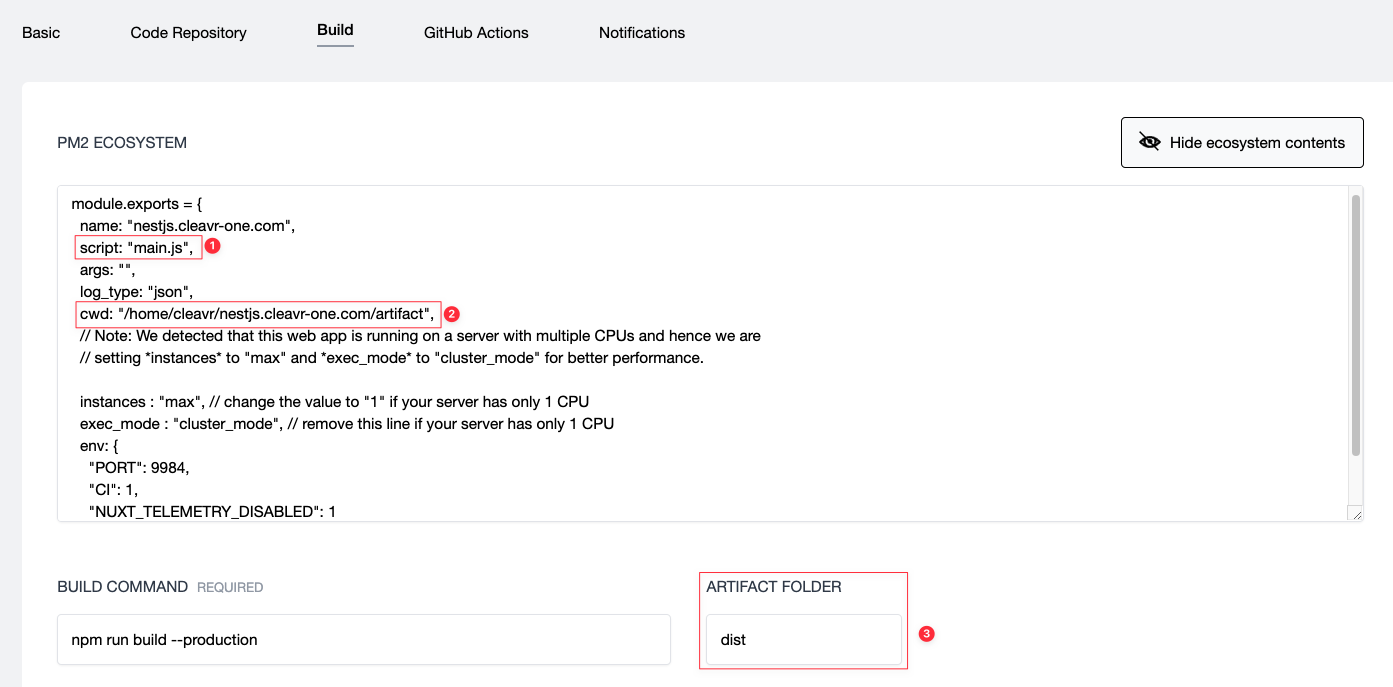
Now head over to the Build tab. In the PM2 Ecosystem change the value for the script to main.js, for the cwd change it to point to /artifact path. You can just replace the /current with /artifact in the value for cwd. Now, update the Artifact Folder to dist.
Let's make a final change and we’re good to make our initial deployment. Navigate to Webapp > Environment and specify the port number as assigned to our site and sync the environment variables to the server. The port number assigned to a site can be found from Server > Site > Site Details. You can specify other credentials required in your app from here.
PORT=9884
You can now head over to the Deployments page and click the DEPLOY button.

Take control of your servers and deployments.Without breaking a sweat.
Sign up for a 5-day free trial of Cleavr Pro. No credit card required until you decide to subscribe.
Sign up for freeCleavr
© 2026 Vistafari LLC. All rights reserved.
❤️ ☕️ 🎨