10 September 2022
blog
mailhog
How to trap emails with MailHog for staging sites
Here at Cleavr, we use three different environments: development, staging, and production. The need to send emails arises while testing modules such as user registration and password reset in different environments. We also send an email to a user once server provisioning completes. It becomes annoying when we have to send a test email to a live email inbox. Test emails pile up, make our inbox look dirty, and can become costly when we have to send them to live inboxes.
If your product uses a tool like MailGun for email delivery, you’ll obviously want to use it in a test mode. However, there are certain limitations that come with it. MailGun has email address limitations, meaning you can only send emails to five authorized users. If you want to send an email to a new address, then you’ll have to add the address to the list of authorized emails and accept the invitation before sending emails to it.
While testing Cleavr and Feedmas, we wanted to tackle this limitation, the annoyance of sending emails to real addresses, and reduce the expenses incurred from sending test emails. The first step we took was to set up multiple test emails. With this approach, we still had to switch between one inbox and another.
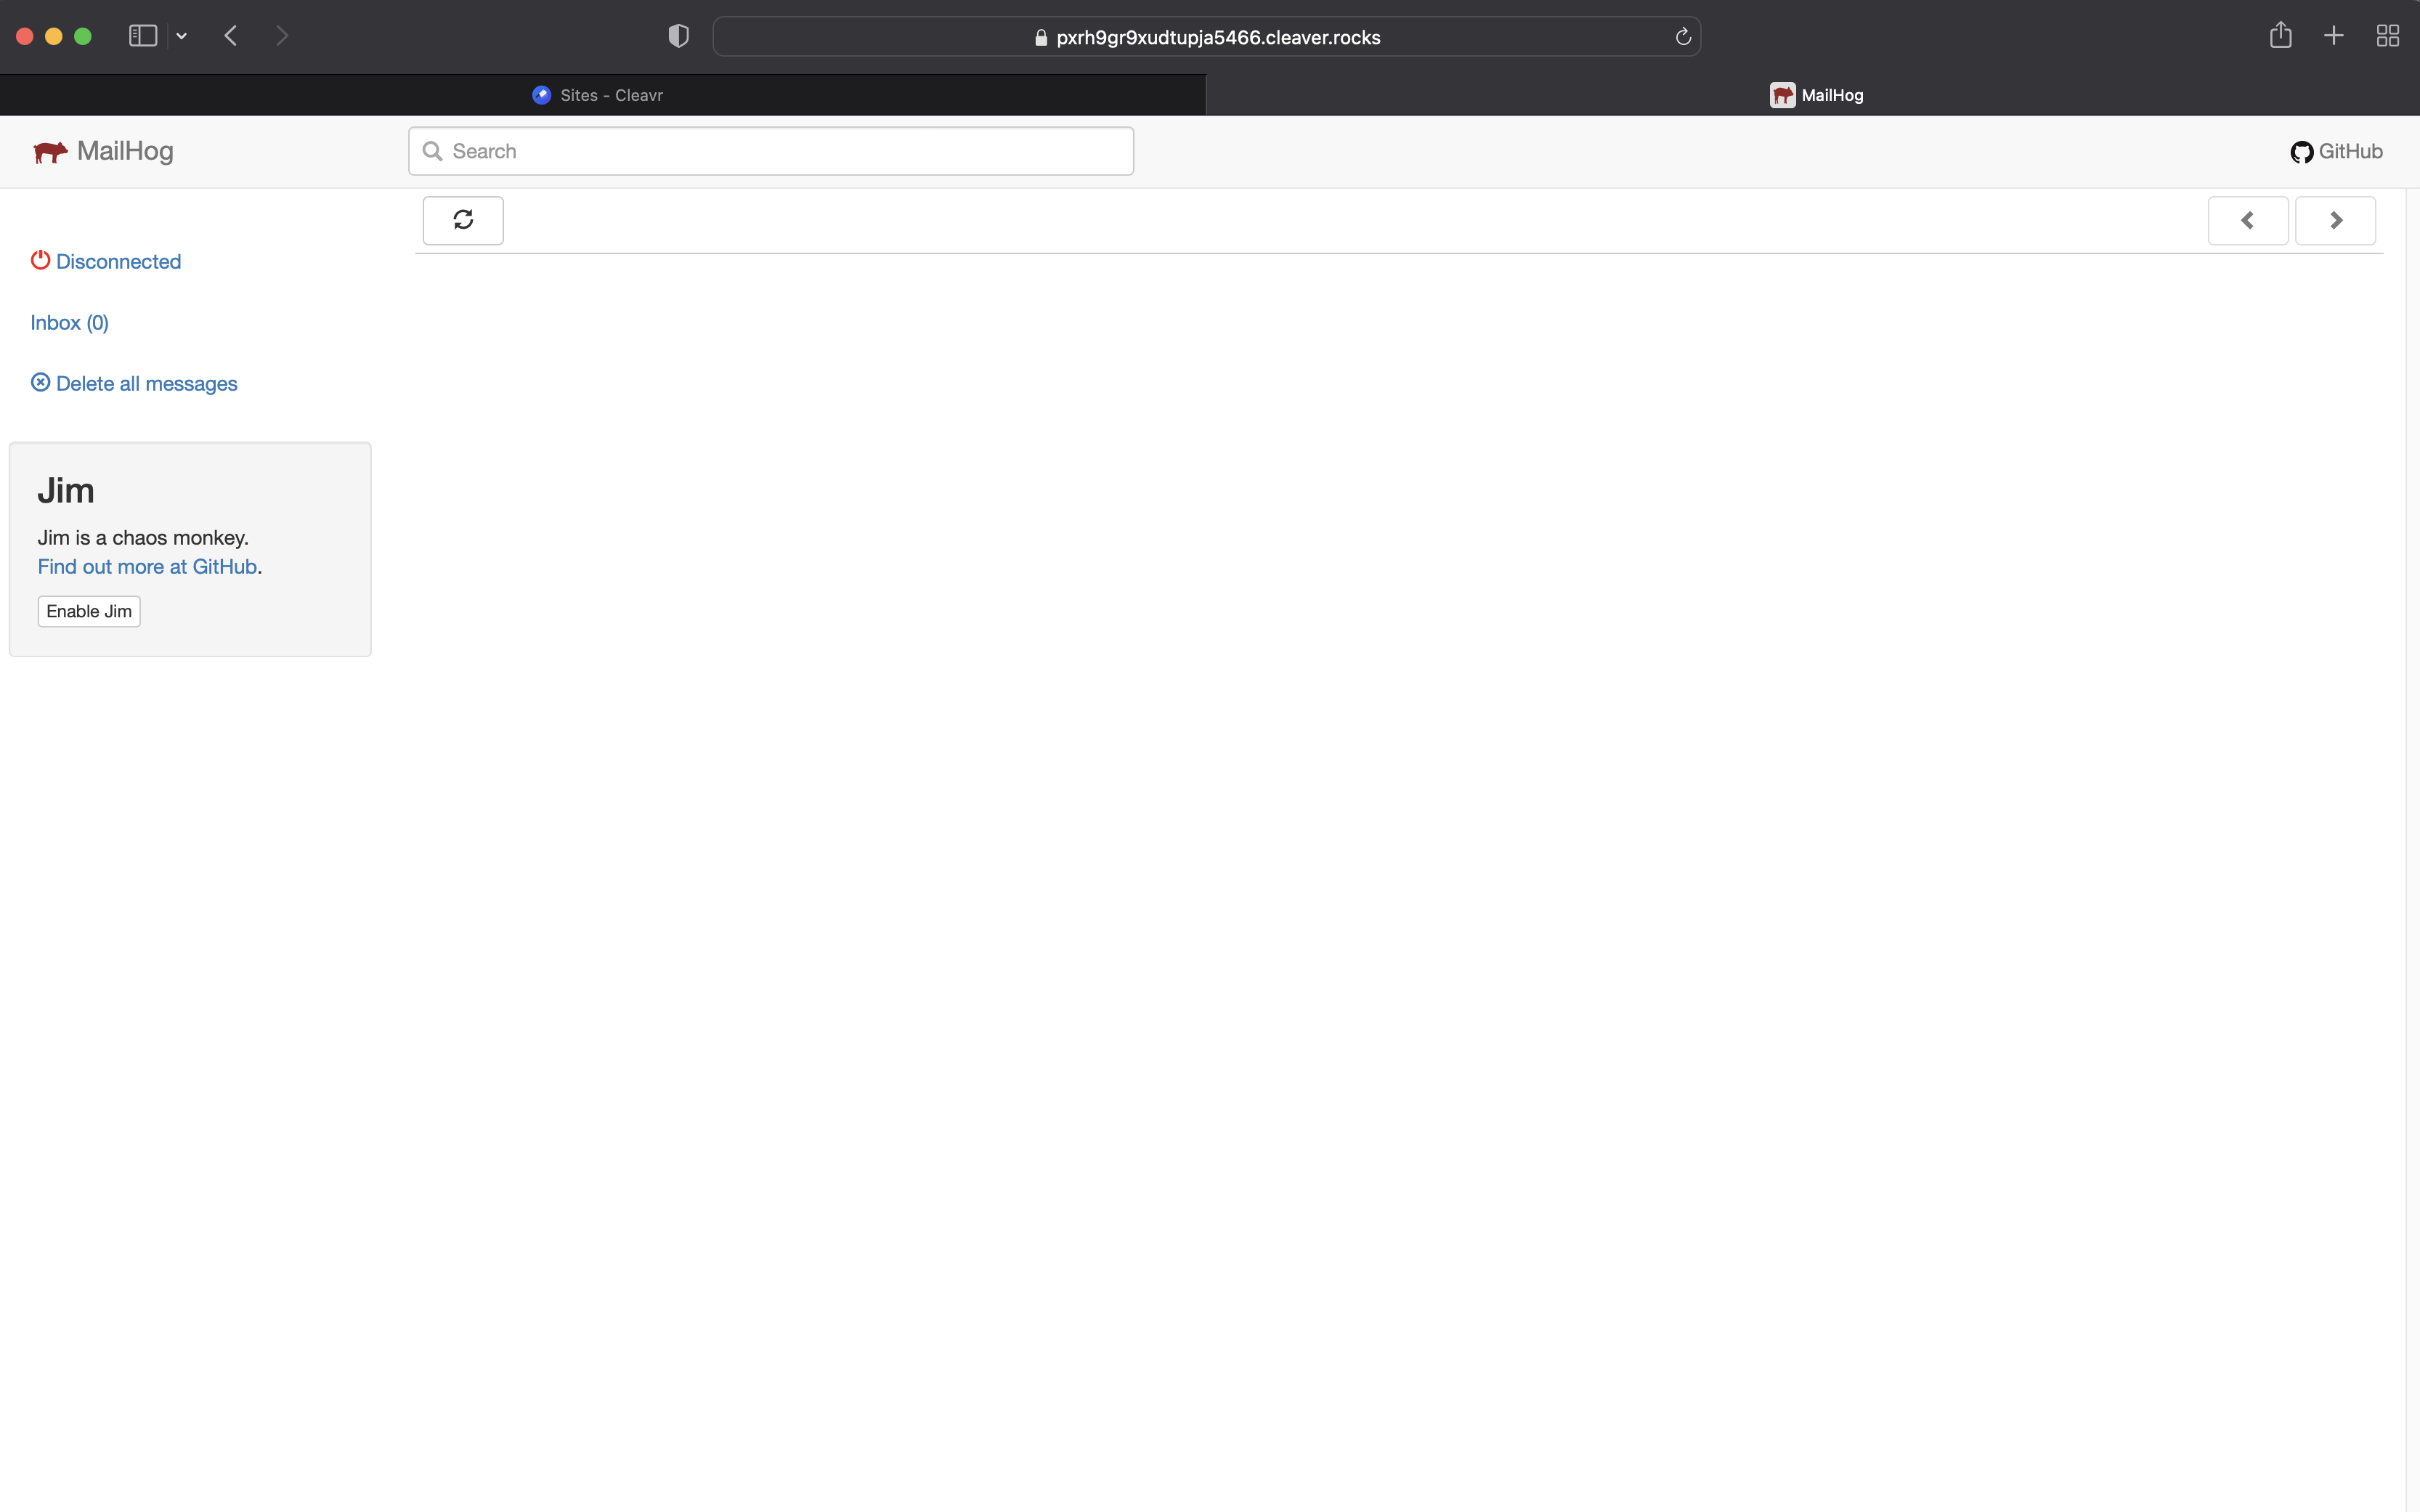
Ultimately, we decided to host MailHog on a shared server for our use case. MailHog is an email testing tool for developers. It runs on an SMTP server which catches any messages sent to it. With MailHog, we are able to see our test emails in a web interface instead of the inbox. And we didn't have to worry about remembering the test email addresses.
Let me show you how we hosted MailHog on a shared server using Cleavr.
Step 1: Provision a server
Step 2: SSH into the server and run the following commands:
sudo apt-get -y install golang-go
go install github.com/mailhog/MailHog@latest
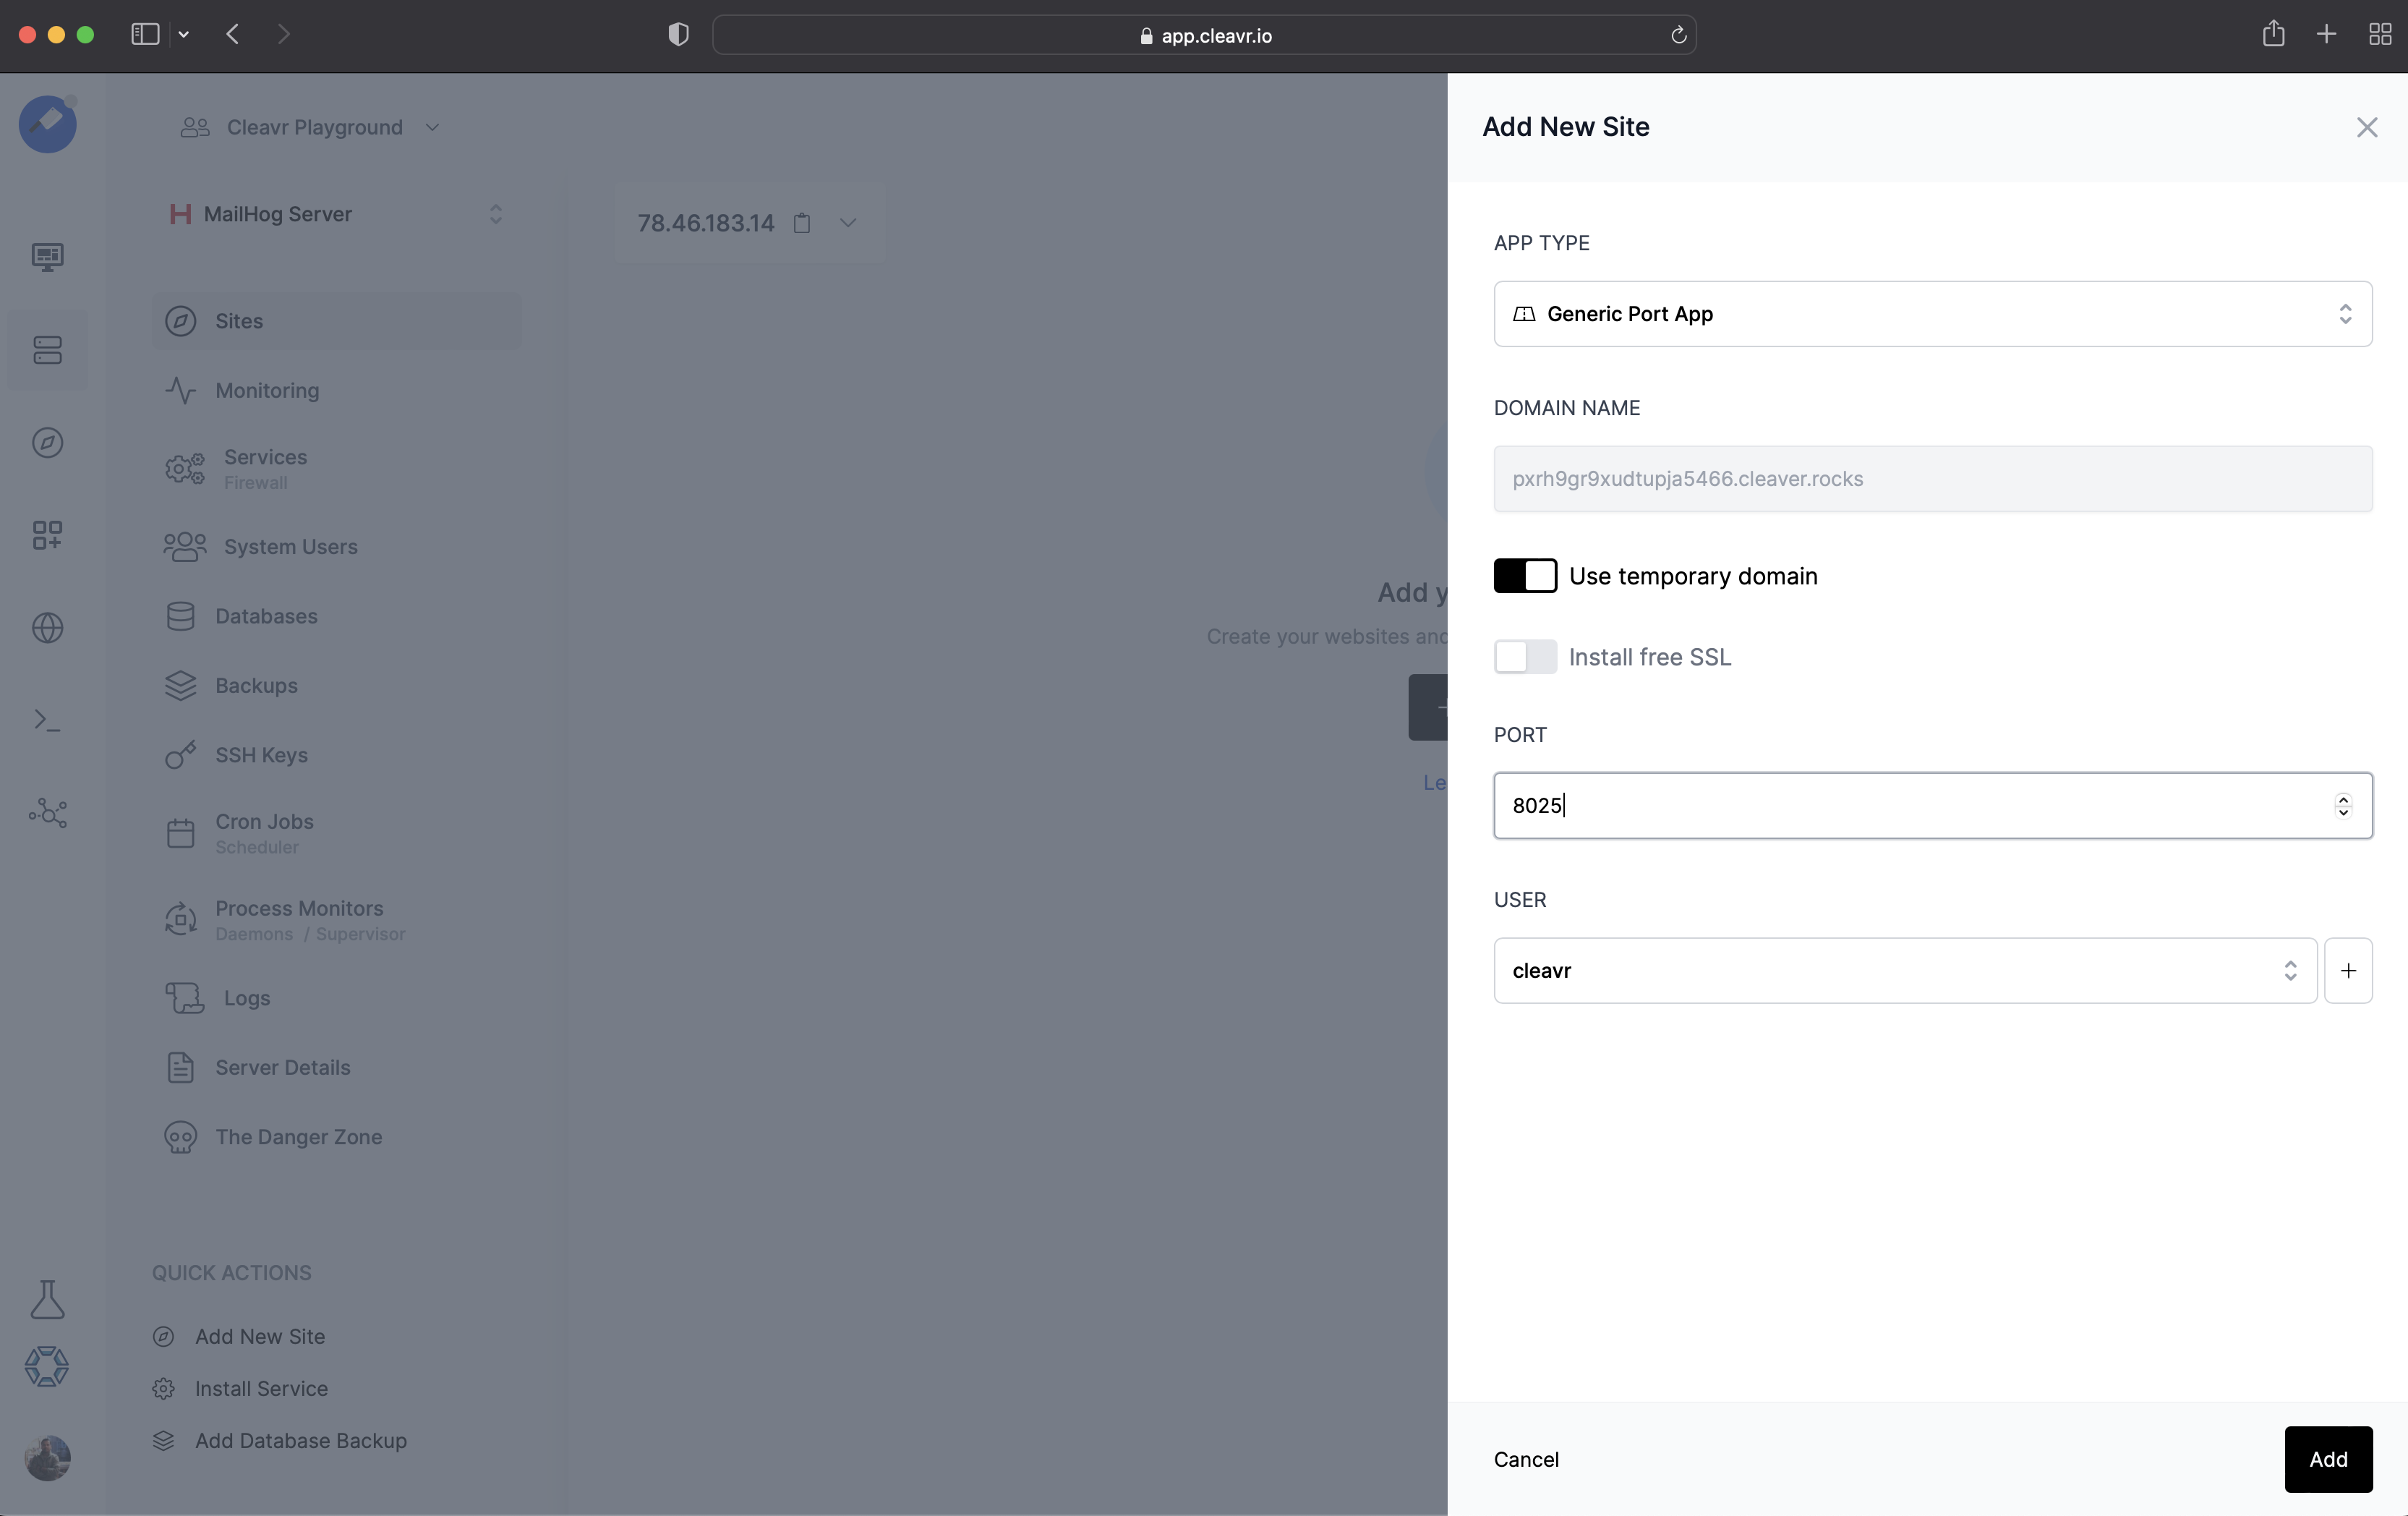
Step 3: Create a site with Generic Port App as a Webapp Type to expose the MailHog web interface.
Goto Server > Sites and click on the Add Site button.
Provide the domain name you wish to use or you can use a free Cleavr domain by enabling Use temporary domain. Cleavr takes care of enabling SSL for the free domain. Also
with a custom domain, you can install free SSL certificates for your site.
The default port that we want to expose is 8025, provide it in the PORT input field. If you’re running MailHog in a different port you can provide a different port number.
Step 4: Setup Process Monitor.
Goto Server > Process Monitor and click on Add New Process Monitor.
Provide the full path to MailHog as the command. For e.g.: /usr/bin/mailhog, /root/go/bin/MailHog. You can leave the Advanced Options to default and Add the Process Monitor.
Once the Process Monitor is added the MailHog port we exposed will run on the site we created.
For authentication, you can use MailHog's authentication or alternatively use Authentication feature provided by Cleavr.
Take control of your servers and deployments.Without breaking a sweat.
Sign up for a 5-day free trial of Cleavr Pro. No credit card required until you decide to subscribe.
Sign up for freeCleavr
© 2026 Vistafari LLC. All rights reserved.
❤️ ☕️ 🎨