22 August 2023
Javascript
React
Deploying React with ease on Cleavr
Introduction
React has become one of the most popular JavaScript libraries for building modern and interactive web applications. Its component-based architecture and virtual DOM make it efficient and scalable, attracting developers worldwide. However, deploying a React app can be a daunting task, especially for those new to server configuration and deployment processes.
Enter Cleavr, a powerful deployment platform designed to simplify the deployment and management of web applications. Cleavr takes the hassle out of the deployment process, allowing developers to focus on building exceptional applications without worrying about complex server setups.
In this blog, we will guide you through the process of deploying your React app on Cleavr with ease. Whether you are a seasoned developer or just starting with React, Cleavr provides an intuitive interface that streamlines the deployment process from start to finish.
To get started, we’ll first provision a server in Cleavr. We will next provide you with a step-by-step walkthrough of the subsequent stages needed to deploy your React app.
Setting a NodeJs static site
To set up your React app, you’ll need to configure it as a NodeJs static site. To do this, let’s go to Sites > Add New Site and select App Type to be NodeJs Static from the dropdown menu.
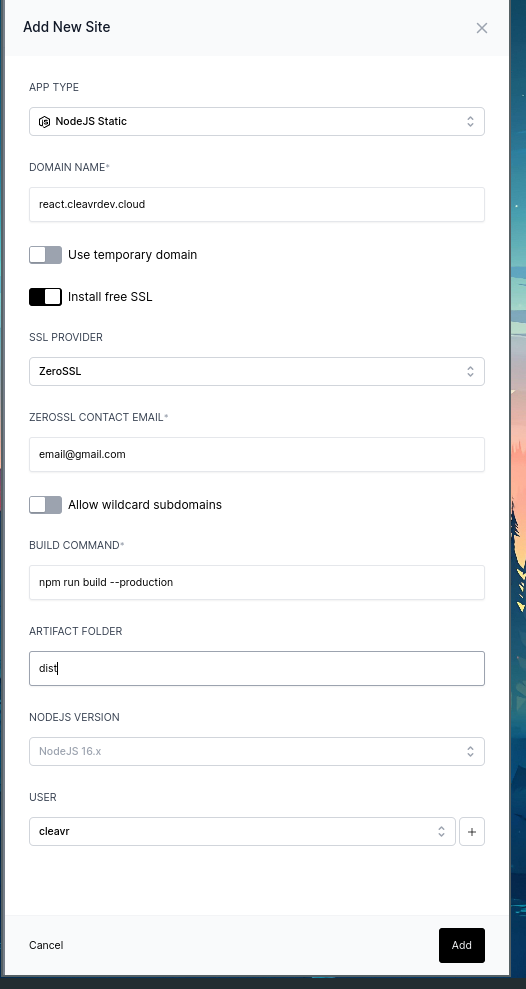
You can configure your build command and specify your artifact folder during
the setup process. The default build command, usually
npm run build –production, suits most scenarios. However, if you have a
distinct build command, Cleavr enables you to utilize your custom build
command as well.
Connect to your repository and configure build settings
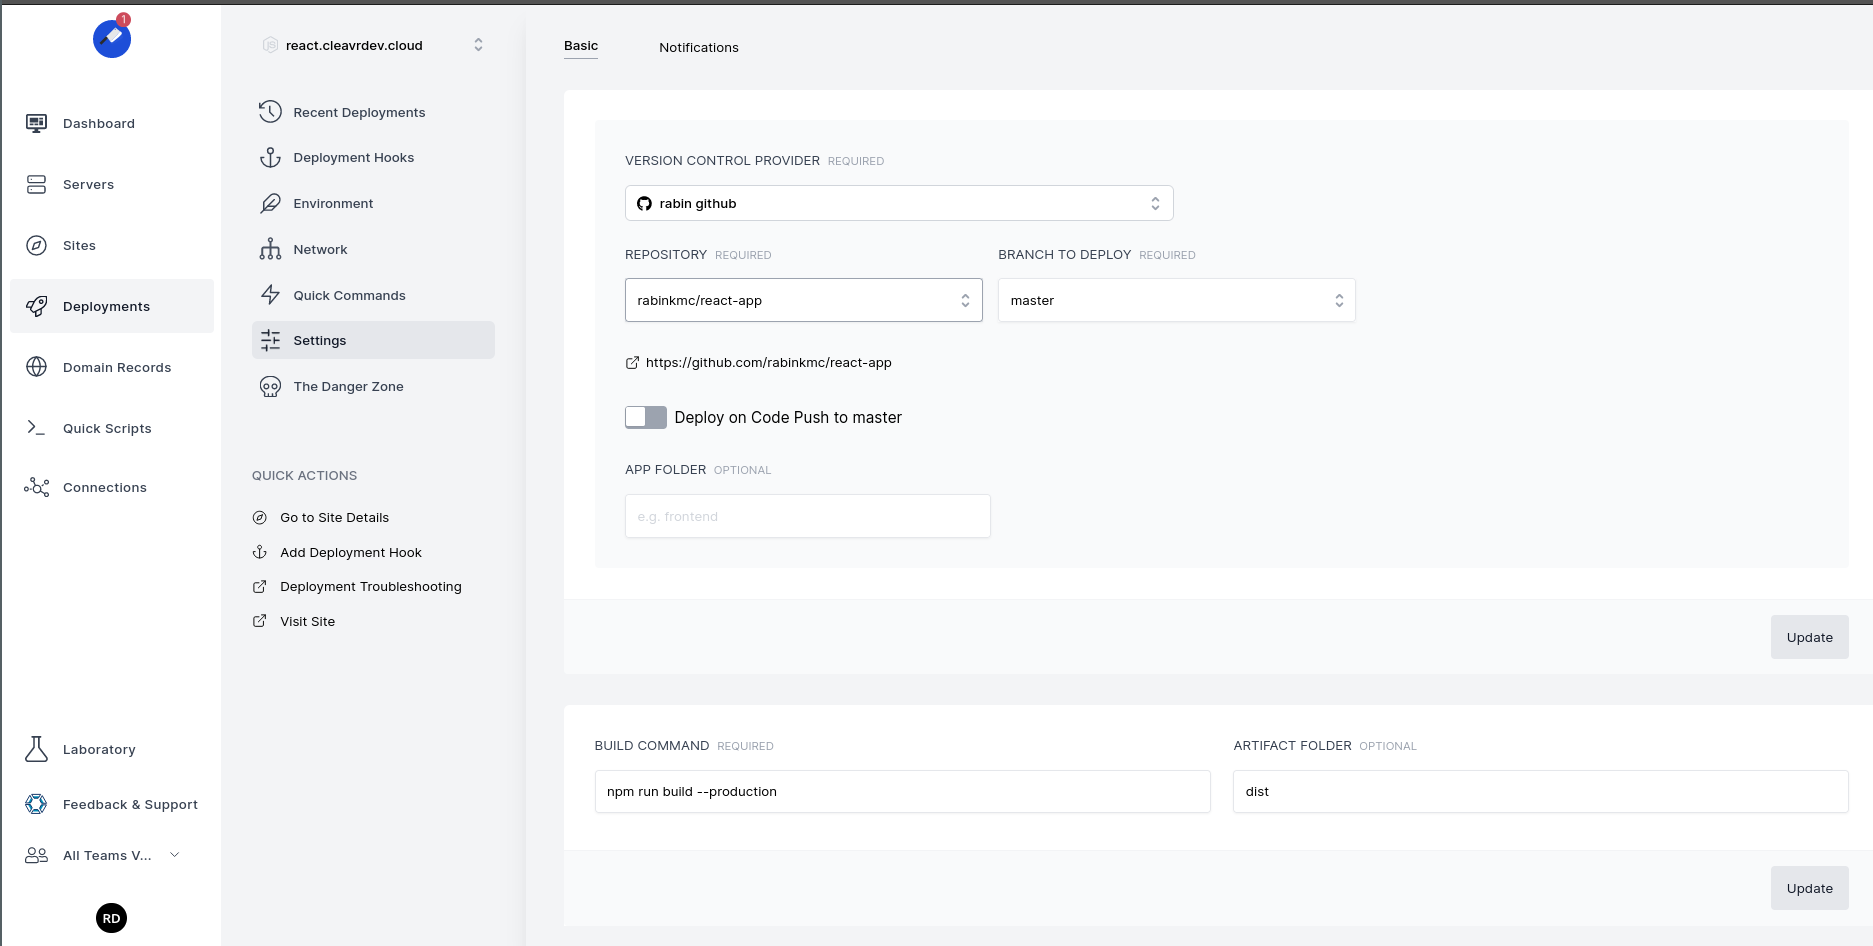
Once that is done, we now need to connect to our react repository. To do so, you can directly click on Finish Deployment Workflow Setup or you can go to the Deployment section and select the site you want to deploy.

Now, go to the build settings section on the left. Select and connect to the repository.
Deploy your React app
Now, all we need to do is just deploy our React app. To do so, we go to Deployments > Recent Deployment and click on Deploy.
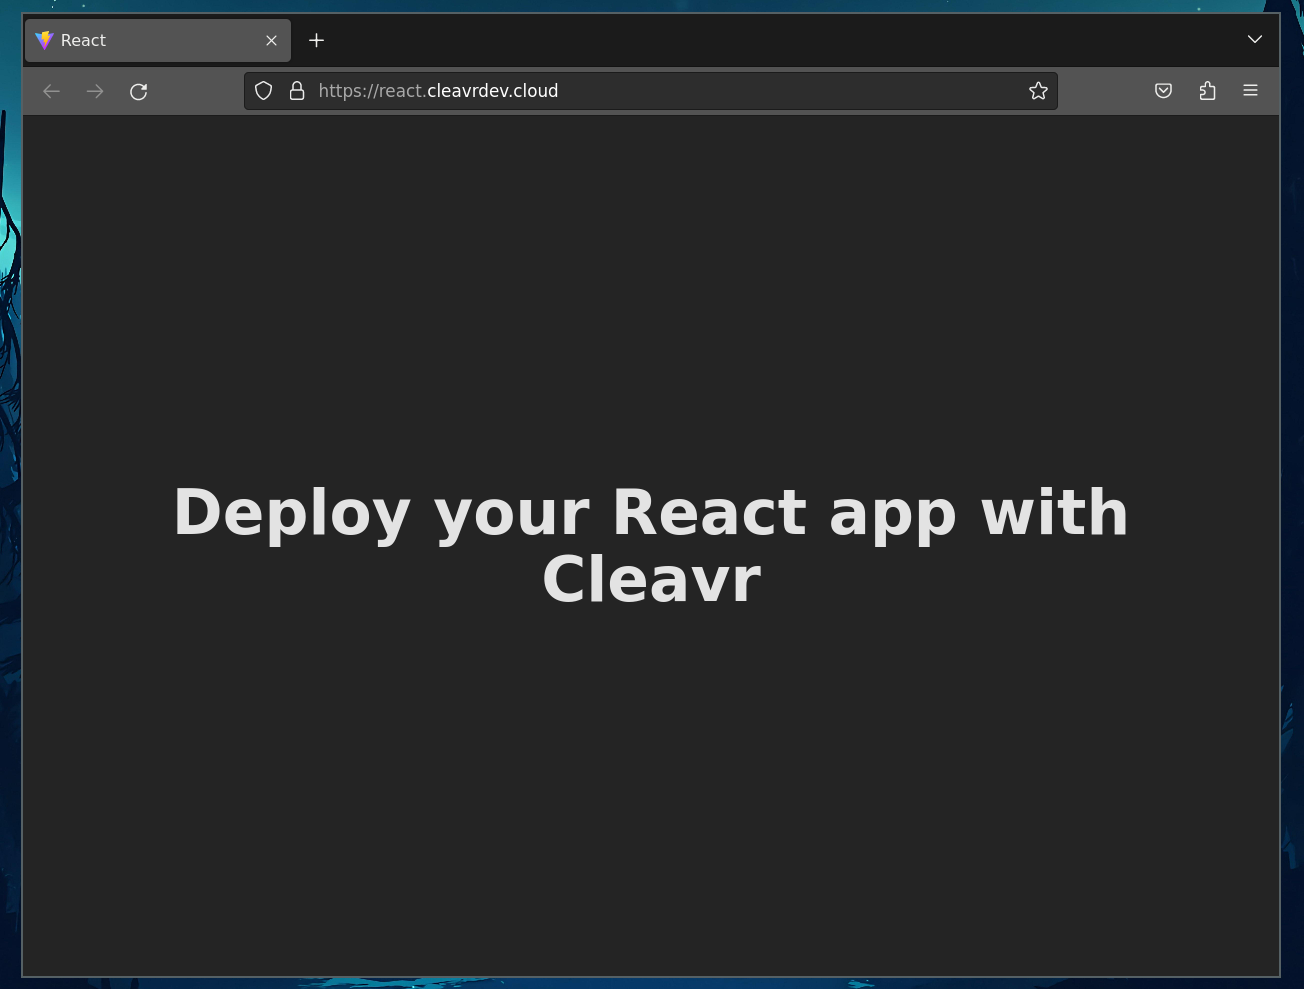
Hurrah! We now have our React app deployed. It was that easy, set up a NodeJs static site, connect to your repository, and then just click on Deploy.
I hope you now have a solid understanding of how to deploy your React app on Cleavr confidently. With Cleavr's user-friendly interface and powerful features, you can streamline your deployment process, ensure your app's availability, and spend more time on developing cutting-edge features.
Take control of your servers and deployments.Without breaking a sweat.
Sign up for a 5-day free trial of Cleavr Pro. No credit card required until you decide to subscribe.
Sign up for freeCleavr
© 2026 Vistafari LLC. All rights reserved.
❤️ ☕️ 🎨