30 January 2022
remix
guide
How to deploy Remix apps
Remix is quickly becoming a popular NodeJS, full-stack web framework that aims to put your focus into crafting delightful user experiences.
In this guide we'll walk through deploying an example blog application built using Remix.
Step 1: Build Your Remix App
Of course, the first step is to build a Remix application that we can deploy.
For this walkthrough, we found a blog example by GitHub user Deleteman that we'll fork the project and prep it for build.
Step 2: Add New NodeJS Site
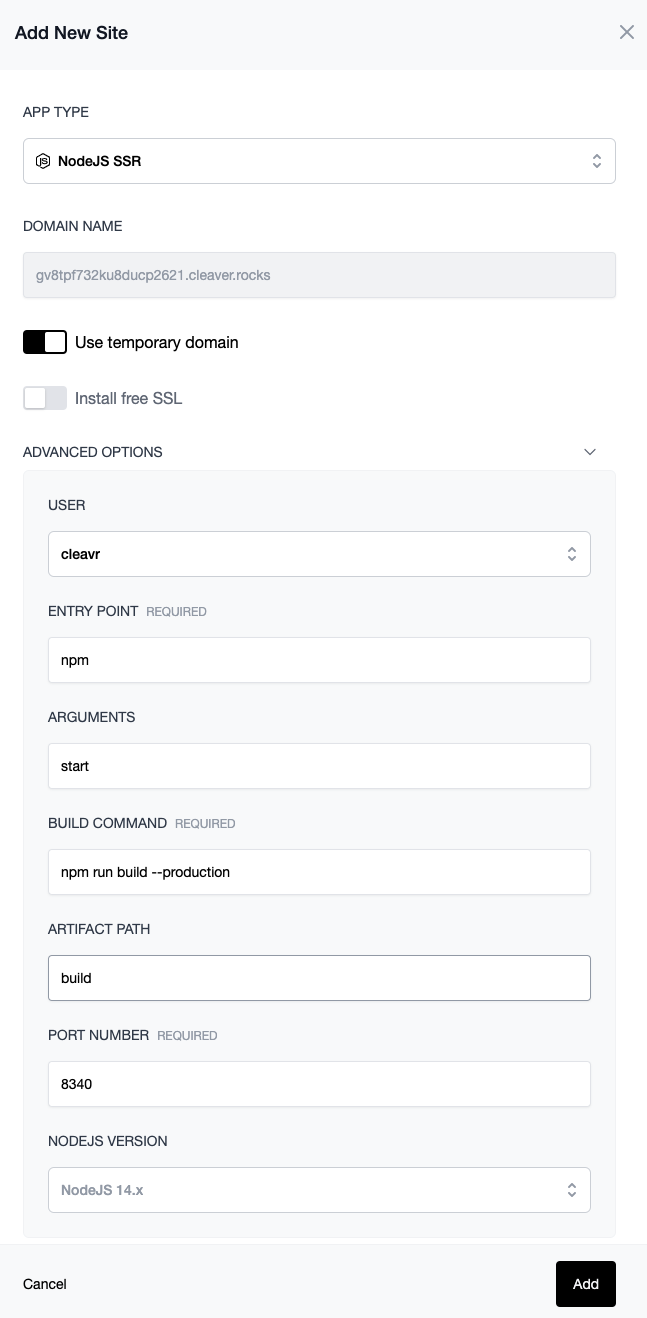
In Cleavr.io, on an existing server we'll click the button to Add New Site.
Make the following configs when adding the new site:
- Set app type to NodeJS SSR
- Set Entry Point to
npm - Set Arguments to
start - Set Artifact Path to
build - Select NodeJS Version of v14 or v16

Click Add to add the new site to the server.
Step 3: Configure Web App
Once the site has been added to the server, click the Setup and deploy link to head over to the web app that was just created for the site and configure the settings.
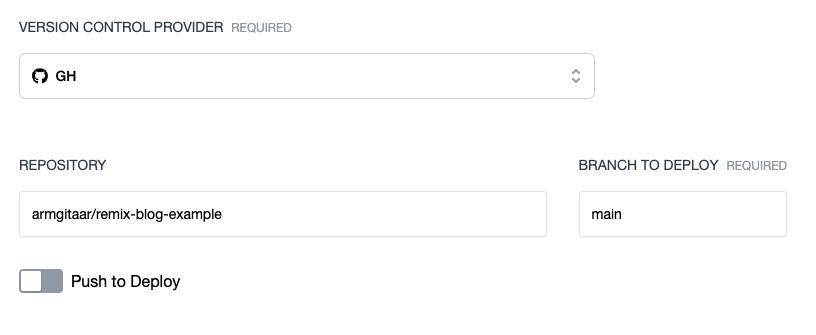
Select the Version Control Provider for where your application code is housed.
For this example, you can use your own GitHub profile and then point to our public repository.
Enter armgitaar/remix-blog-example for the Repository and set the Branch to Deploy to main.

Click the Update button to save settings.
Step 4: Configure Web App - Environment Variables
If you have environment variables for your app, you can set them up in the Environment section. The Cleavr Environment section works with .env files that you may add to your app. If you want to use .env, you'll
need to add the dotenv module to your project and update your start script in package.json. Check out Remix docs for more info.
You may also choose to add environment files directly to the PM2 Ecosystem settings in the web app > settings > build section. Or, you can setup your own alternative method for referencing environment variables.
Step 5: Deploy!
Once you have your Remix web app configured, go to the deployment section and deploy!
Take control of your servers and deployments.Without breaking a sweat.
Sign up for a 5-day free trial of Cleavr Pro. No credit card required until you decide to subscribe.
Sign up for freeCleavr
© 2025 Vistafari LLC. All rights reserved.
❤️ ☕️ 🎨
