21 January 2022
git
How to self-host GitLab
Do you want to maintain your code repositories on your own servers? The GitLab Enterprise Edition is a popular self-hosted code repository option. Cleavr helps you setup your own GitLab EE edition.
To install GitLab EE on one of your servers, follow these instructions.
Step 1: Provision A Plain Server
In Cleavr, provision a new server and select Plain Server for the server type.

GitLab EE will need to be installed on a server that does not have NGINX running on it, which is why the plain server option must be selected.
You should also consider using a more beefy server to host your instance of GitLab EE. We recommend a server with 2 or more CPUs. You can use a less powerful server; however, the experience will be very sluggish.
Step 2: Install GitLab EE
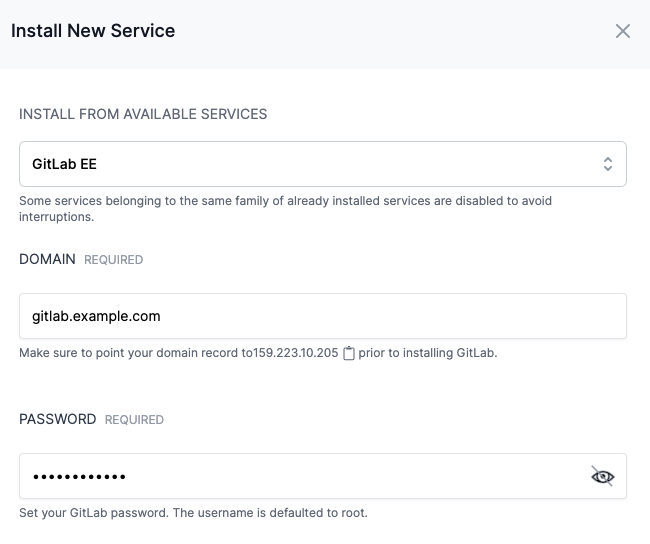
Once your server has been provisioned, navigate to the services section and click the Install Service button.

Add in the domain you'll be using for your GitLab EE instance. It is best to make sure your DNS record is pointing to the server prior to installing so that SSL certs are correctly installed.
Add in your Password. This password will be used for you GitLab login credentials.
Your default credentials will be:
- Username: root
- Password: your password that you entered
Step 3: Create User Token
Once your GitLab EE instance has completed, log into your GitLab account using the account credentials above.
Then, refer to the following instructions to create a personal access token.
Step 4: Add VC Profile
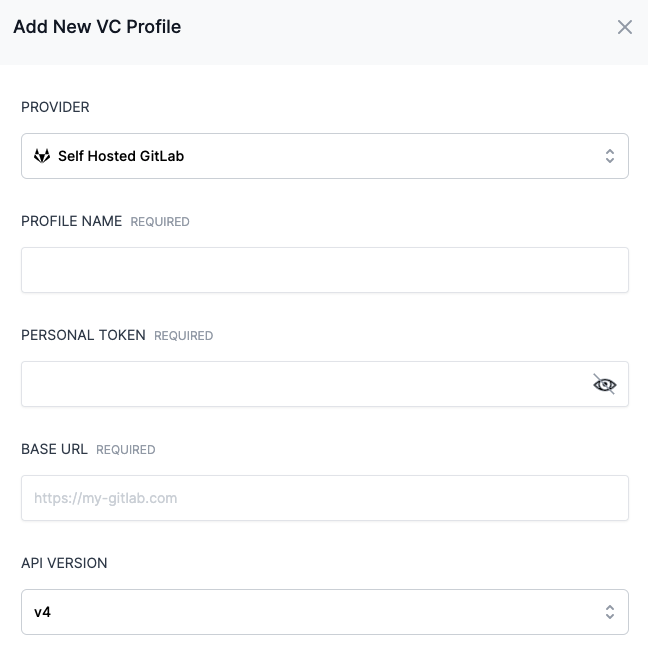
You can now connect to your GitLab EE instance in Cleavr by adding a new VC Profile.

Be sure to add in the personal access token created in the previous step and the URL for your GitLab EE instance.
If you need support for GitLab EE, please refer to their documentation.
Changing The Domain
There may likely come the time where you need to change the domain.
If this happens, you can SSH into your server to make the change.
Edit the following file:
/etc/gitlab/gitlab.rb
Find the external_url and update it to the new one you want to apply.
Then, run the command to reconfigure Gitlab EE:
sudo gitlab-ctl reconfigure
Lastly, restart the service:
sudo gitlab-ctl restart
Take control of your servers and deployments.Without breaking a sweat.
Sign up for a 5-day free trial of Cleavr Pro. No credit card required until you decide to subscribe.
Sign up for freeCleavr
© 2025 Vistafari LLC. All rights reserved.
❤️ ☕️ 🎨
