08 April 2022
blog
Soketi Server for RealTime Updates (Part 1 - Installation)
Read the
Have you ever noticed how the stock prices increase or decrease on trading sites in real-time?
To enable these types of real-time updates, you can use something called a WebSocket.
WebSockets make it possible to open two-way, interactive communication between a user’s browser and a server.
Today, we’re going to discuss installing an example WebSockets server using a solution called Soketi. Soketi is a simple, fast, and resilient open-source WebSockets server.
Setting up your production environment is not going to be a straightforward task. Installing Soketi, Supervisor, configuring the environment, creating a site to utilize Soketi, configure NGINX, and that's just skimming the surface... That’s a lot of mundane work...
Let's make this a fun endeavor by installing and exposing Soketi using Cleavr, and letting Cleavr do all of the hard, dull work!
For demonstration purpose, I’ve already provisioned a server in Cleavr. I've also added my SSH key so that I can SSH into the server and install Soketi by running the following command:
npm install -g @soketi/soketi
Since we’re here, let's also create a config file that is required for Soketi. Create a file located at /home/cleavr/soketi.json with following content:
{
    "appManager.array.apps.0.id": "app-id",
    "appManager.array.apps.0.key": "app-key",
    "appManager.array.apps.0.secret": "app-secret",
    "appManager.array.apps.0.enableClientMessages":true,
    "debug": false,
    "port": 6001
}
Once Soketi is installed on your server, you can then run soketi start to start the Soketi server. However, Soketi will only run for as long as the terminal is open.
Let’s start Soketi in a better way so that we don’t have to worry about re-starting it time and time-again.
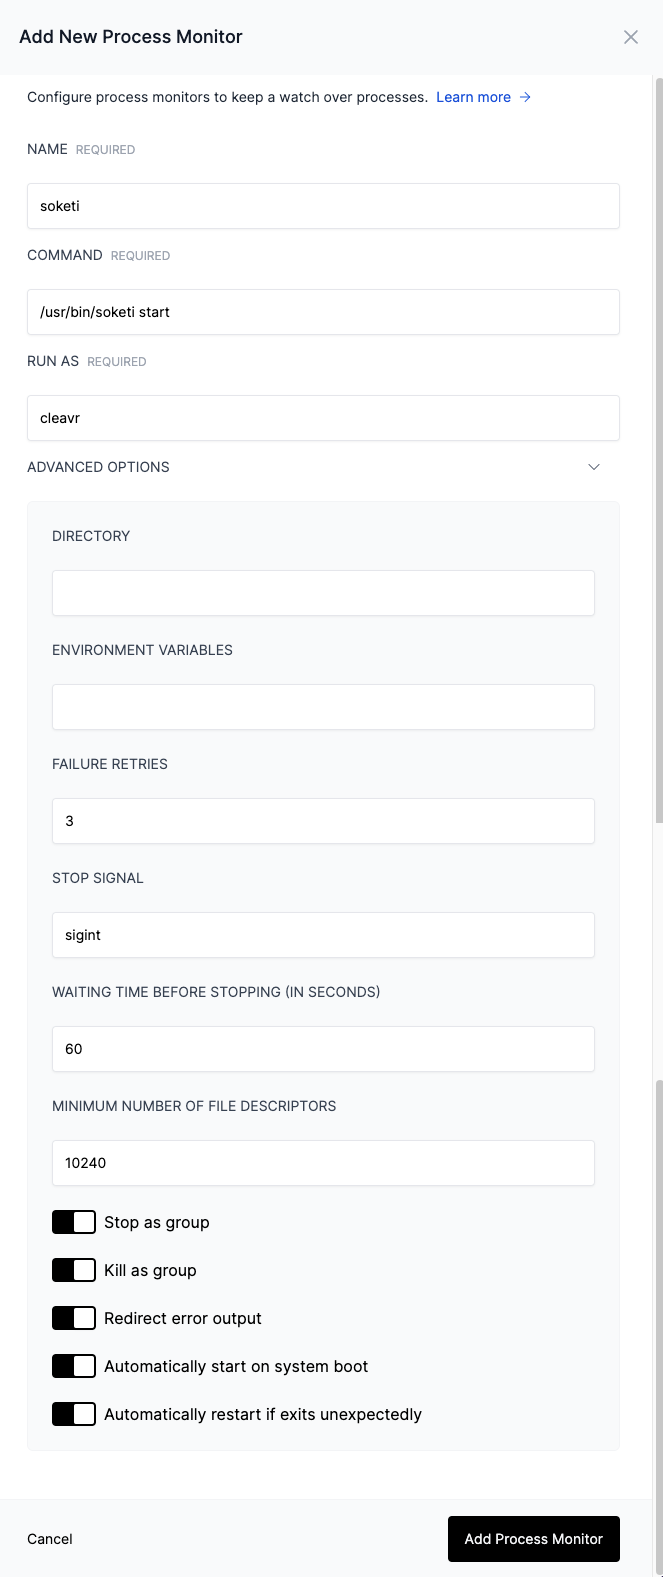
Head over to Server > Process Monitor and click on Add New Process Monitor to keep the server alive permanently.
Provide the name of the Process Monitor. I’ll be using soketi as the name.
For Command, we'll add the command that is used to run the Soketi server, which is soketi start. We'll want to provide a full path to Soketi for this command as well, which is /usr/bin/soketi.
So, our full command should look like: /usr/bin/soketi start –config=/home/clear/soketi.json.
Now, expand the Advanced Options section to provide more config to our Process Monitor.
Fill in the following values:
- STOP SIGNAL (stopsignal):
sigint - WAITING TIME BEFORE STOPPING (stopwaitsecs):
60 - MINIMUM NUMBER OF FILE DESCRIPTIORS (minfds):
10240 - Lastly, enable the options for stop as group, kill as group, redirect error output, automatic start, and restart options.
These are the configs required for Soketi to run as specified in their documentation.
Once created, you can click on the ellipsis menu icon and click on Check Status to view the status or click on View Error Log or View Out Log to check logs.
Once it’s running, Soketi will run on port 6001, unless the port number has been changed to something else.
Now the time has come to create a site and expose our port to the internet!
The good thing about using Cleavr is that Cleavr supports a Generic Port App type, which is what we will use in a situation like this.
Let's head over to the site's section and create a new Generic Port App as App Type and set the port number to 6001.
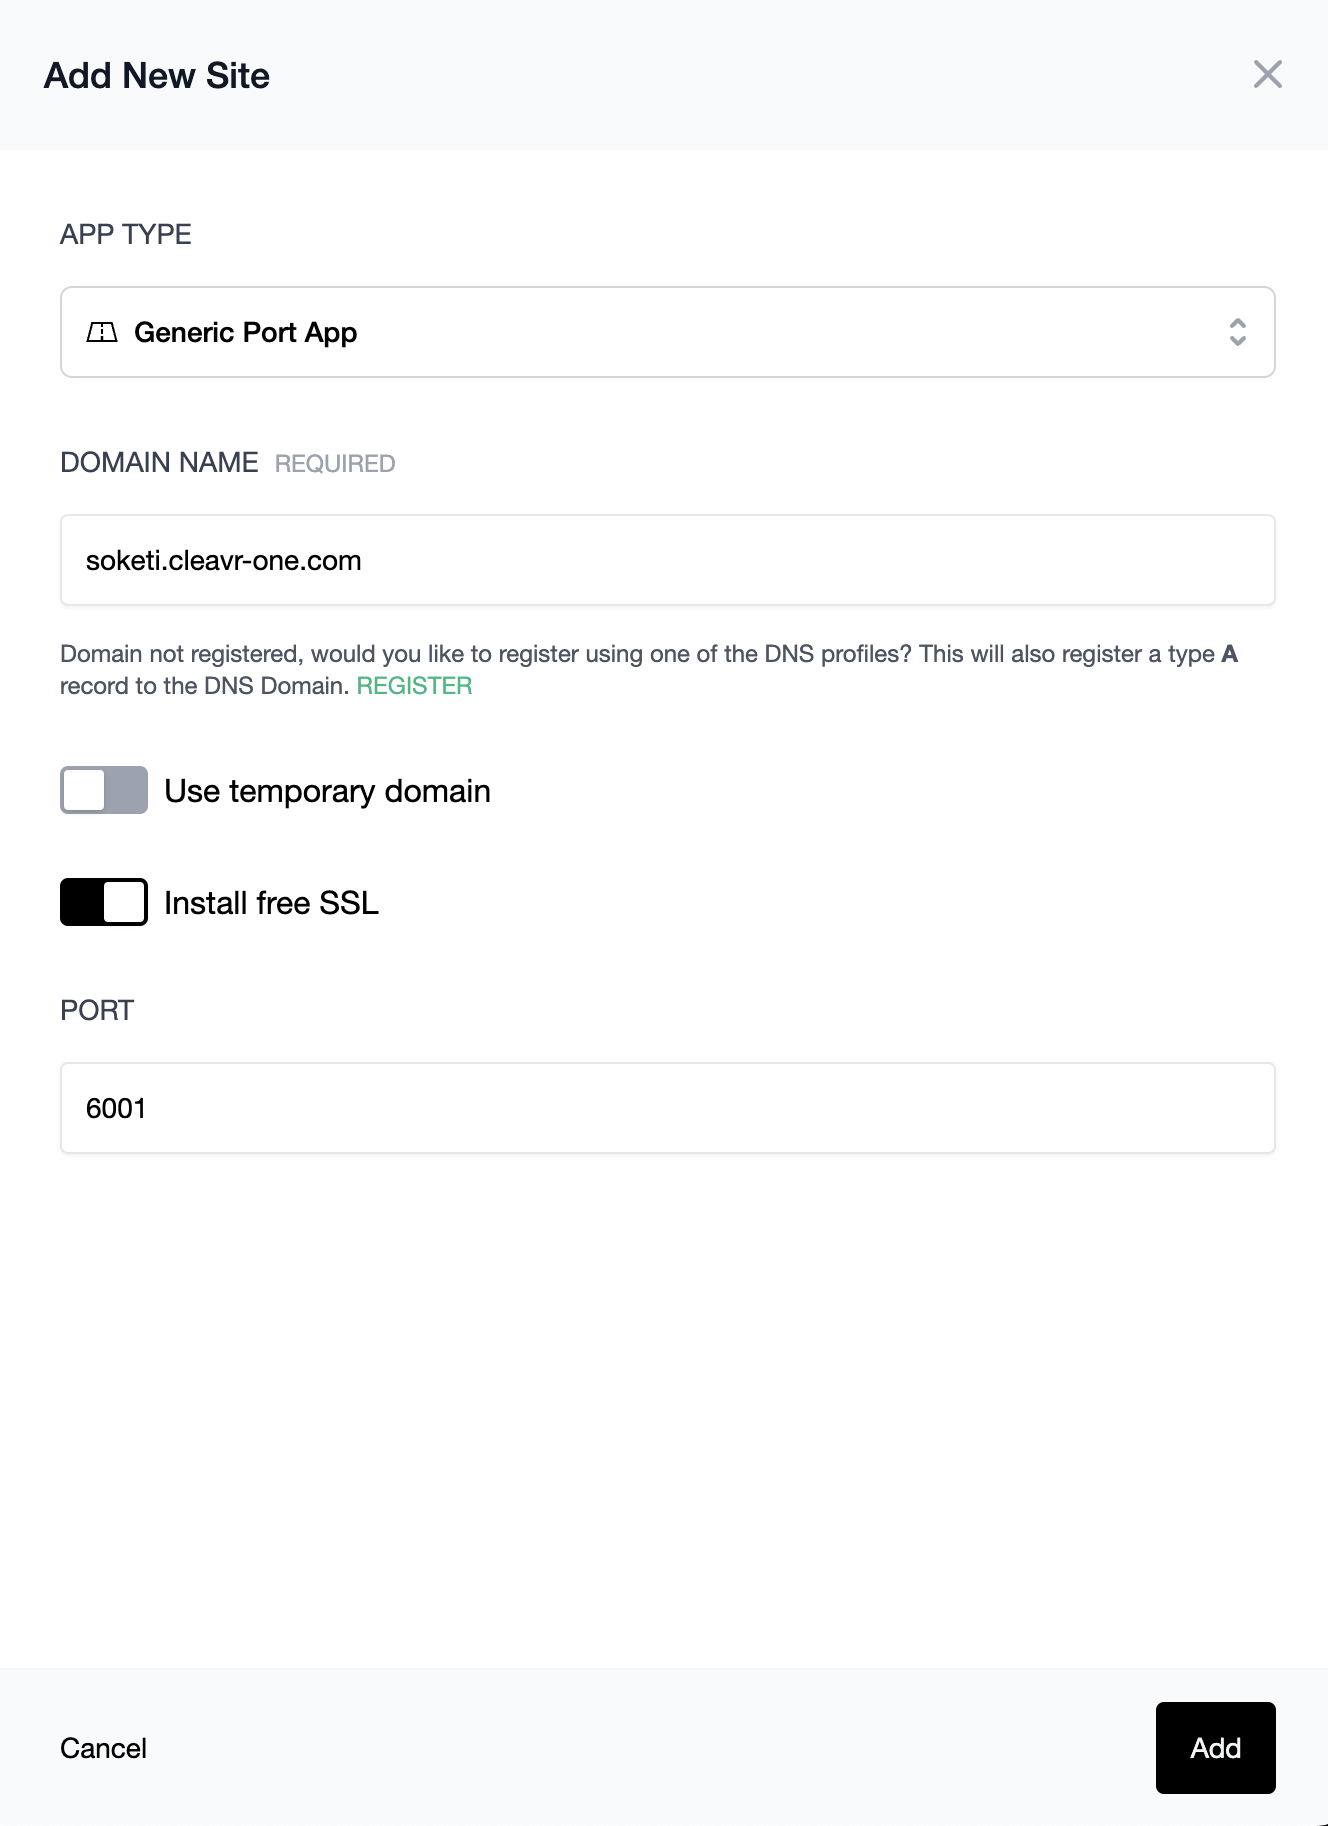
Once the site has been created, you can open the site on your browser and you’re all done setting up the server and it’s ready to use! 🎉
Opening up the site that we just created will greet you with an OK message.
In our next blog for this series, we'll be demonstrating how we can make use of the Soketi server that we just set up in a Demo Laravel chat app.
Take control of your servers and deployments.Without breaking a sweat.
Sign up for a 5-day free trial of Cleavr Pro. No credit card required until you decide to subscribe.
Sign up for freeCleavr
© 2026 Vistafari LLC. All rights reserved.
❤️ ☕️ 🎨