
16 April 2022
blog
Soketi Server for RealTime Updates (Part 2 - Laravel Echo)
There is a better way to enable Soketi Server. You can jump into the
If you're searching for a way to install Soketi on a server, you can follow the part 1 of this blog. We'll be using the Soketi server that we created in part 1 of this blog.
Once the Soketi server is up and running, we will use it in our web apps to enable two-way communication.
If you already have a system developed that uses Soketi and are searching for a way to make it production-ready, this may act as a good guide for you.
For demonstration purposes, I’ll be using Cleavr as a Server Management tool and the Laravel Chat App from Soketi demo app for our webapp. I’ve forked their demo app from https://github.com/soketi/laravel-chat-app. You can fork it as well if you want to try it out and follow along with this blog.
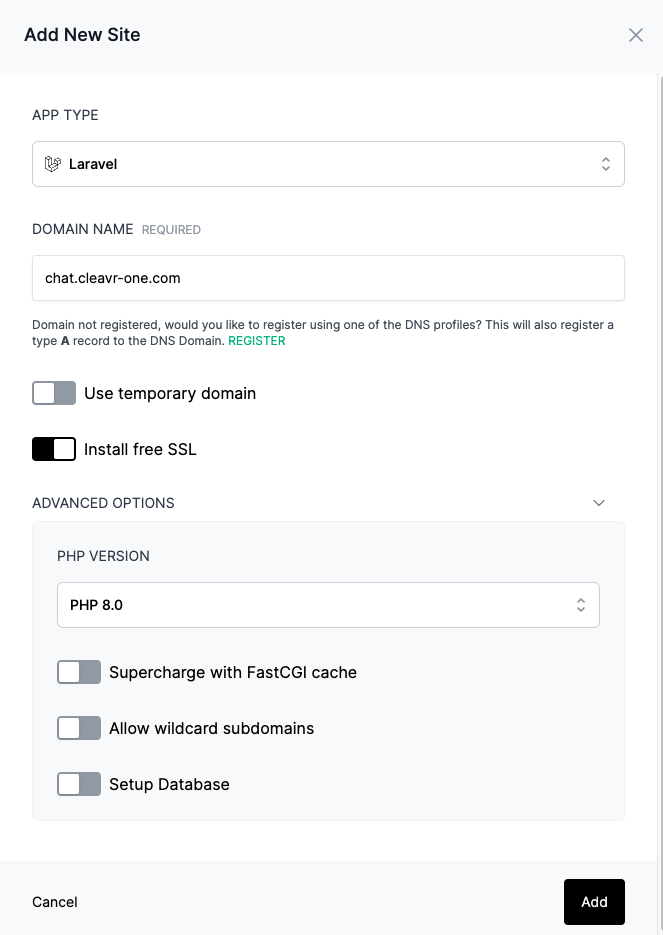
Let's head over to the site section (Server > Sites) and create a Laravel site.
After the site is up and running, let's head over to the web app section and make it ready for deployment.
First of all, let’s create and adjust the web app hooks.
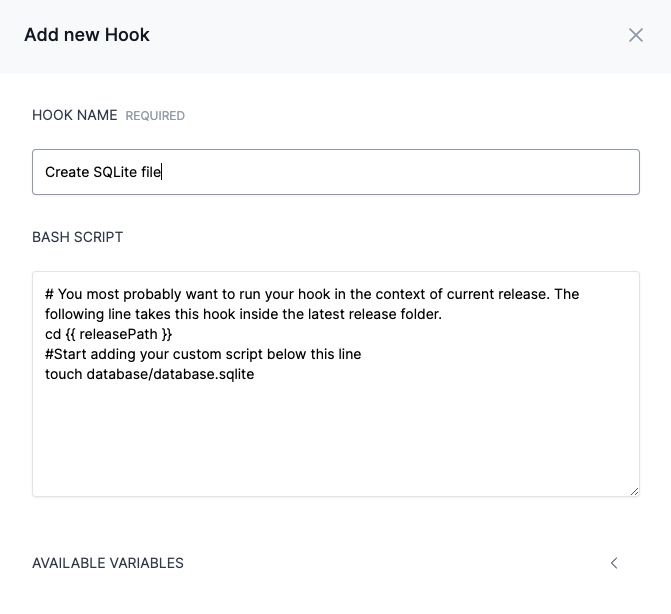
The app we’re using requires some dev dependencies to be installed so I’ll be disabling Install Composer Dependencies and enabling Install Composer Dev Dependencies. According to Soketi's installation guide, we will need to create two new hooks.
The first hook will create the new SQLite database file, which includes touch database/database.sqlite as the bash script.
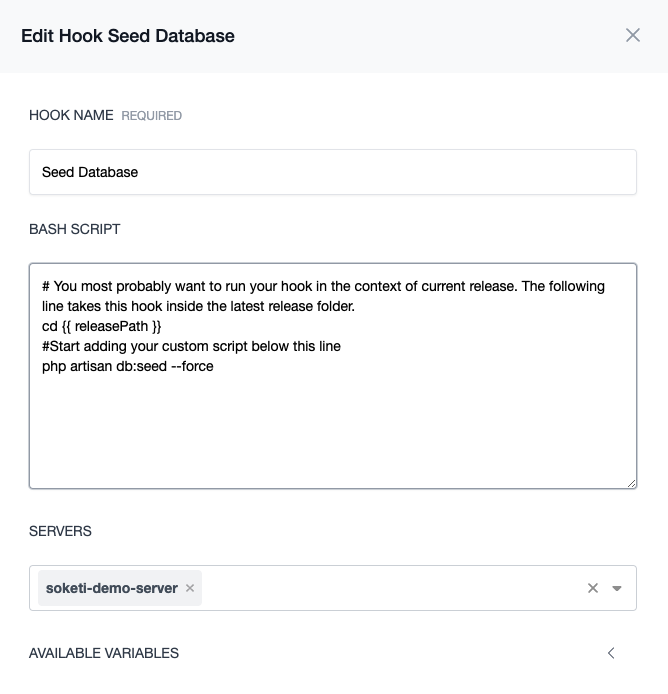
The second hook we’ll be adding runs the seed command to seed our database. We’ll provide php artisan db:seed --force as a bash script to it. You can disable this hook after the initial deployment.
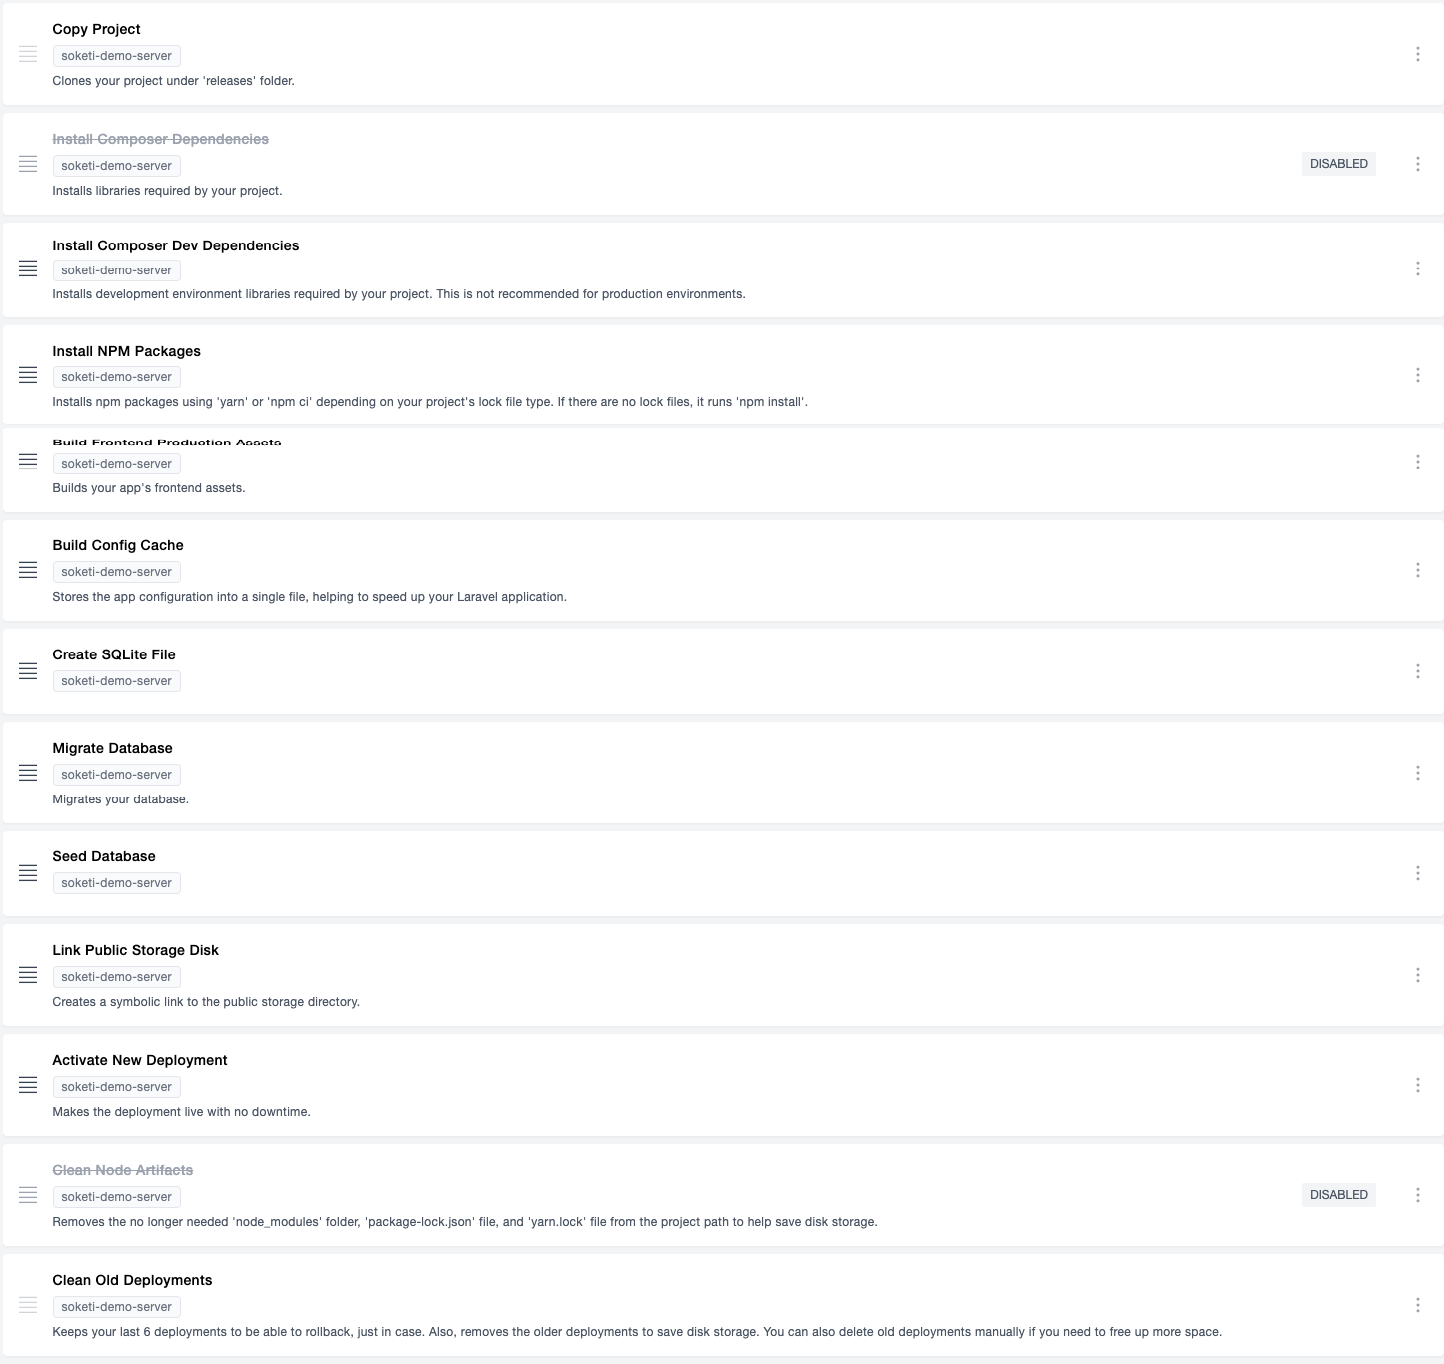
Let's re-arrange the hook and see what they look like. You can drag hooks to arrange them in order.
Now, let's head over to the Environment section and update the environment variables as required.
Our demo app uses SQLite as a database connection so let's update the value for DB_CONNECTION to sqlite.
You can comment or remove other database-related variables.
The web app we're trying to deploy uses Pusher for websocket. Pusher is a hosted WebSockets solution and Soketi is pusher protocol compatible. This means if your application uses Pusher then you won't need to replace your existing code. Since this application uses Pusher, let's adjust the credentials accordingly.
You can create a new app from Pusher and update the pusher app key, id, and secret as provided in App Keys.
PUSHER_HOST should include the site on which your Soketi app is running.
In this case, it will be soketi.cleavr-one.com and PUSHER_PORT will be 443.
PUSHER_APP_KEY=65a668f4718ae62189a2
PUSHER_APP_ID=1375969
PUSHER_APP_SECRET=06d94698e27b35556bc4

PUSHER_HOST=soketi.cleavr-one.com
PUSHER_PORT=443
PUSHER_SCHEME=https

MIX_PUSHER_APP_KEY=”$(PUSHER_APP_KEY)”
MIX_PUSHER_HOST=”$(PUSHER_HOST)”
MIX_PUSHER_HOST=”$(PUSHER_PORT)”
Don’t forget to include PUSHER_SCHEMA=https in your environment file. If you forget to include this you might have to spend a lot of time searching for a solution to errors like `Pusher error: The plain HTTP request was sent to HTTPS port.
Once you’ve made the changes to the environment variables, click on the sync button to save the changes.
Now it’s time to Deploy and see how it works!
Go back to the Web app page and configure the Code Repository (if you haven't configured it already).
You can fill repository with anishghimire862/laravel-chat-app if you’re following along with this tutorial.
Click on the Deploy button to start the deployment.
Once your deployment completes successfully, your laravel app that uses Soketi as WebSocket is ready to use.

Take control of your servers and deployments.Without breaking a sweat.
Sign up for a 5-day free trial of Cleavr Pro. No credit card required until you decide to subscribe.
Sign up for freeCleavr
© 2026 Vistafari LLC. All rights reserved.
❤️ ☕️ 🎨